costa packet(boat)

The tides were not with the “Park & Float”, so I took the bus down from Penryn (clean, modern, on time, reasonably priced and everyone’s wearing a mask. Also – so far the single positive from this pandemic – everything takes contactless.) It passed the almost Genoese-looking church of St Mary the Immaculate and terminated at “The Moor”, Falmouth’s main square, all stout Victorian municipal architecture, cheery bunting and the cry of the gulls.

Finding a large pasty for breakfast was no trouble; determining which of the many different boats from the pier I should be taking to St Mawes only slightly more (another piergoer gave me a tab from his ticket which knocked 50p off the return.) The wind was up, blowing black Cornish flags hard across a low, leaden sky, and the “Duchess of Cornwall” was the first boat sailing that day. We threaded through the great flocks of parked yachts in the Carrick Roads, past a huge floating crane and the Argus.

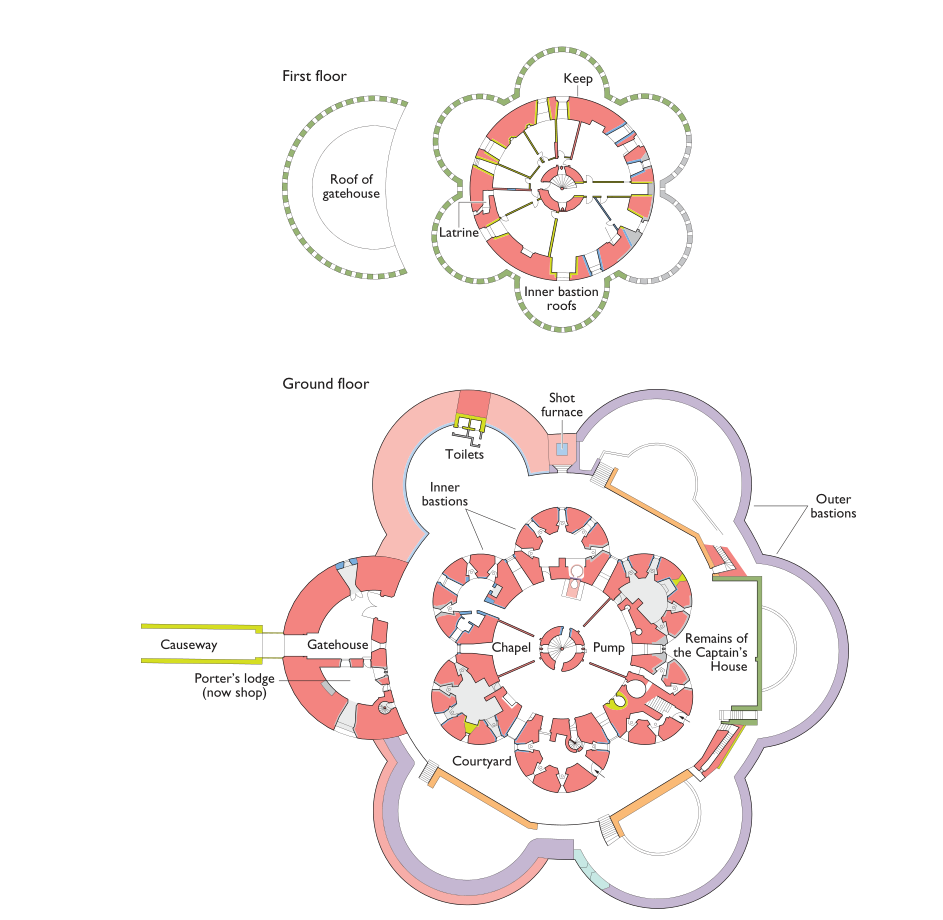
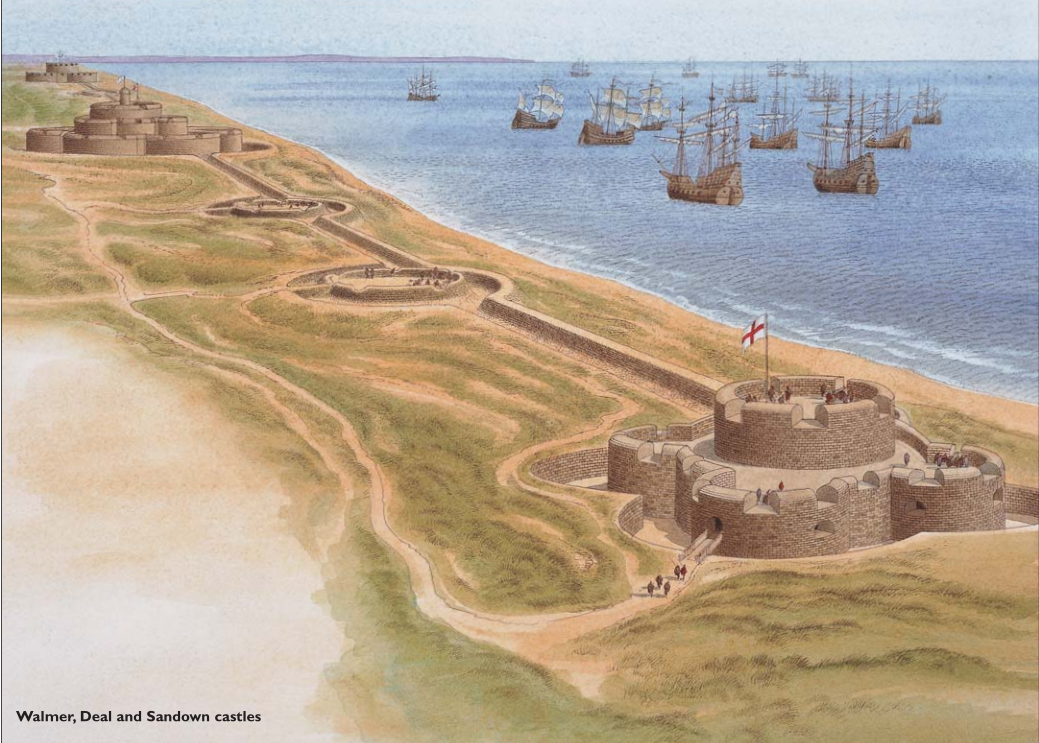
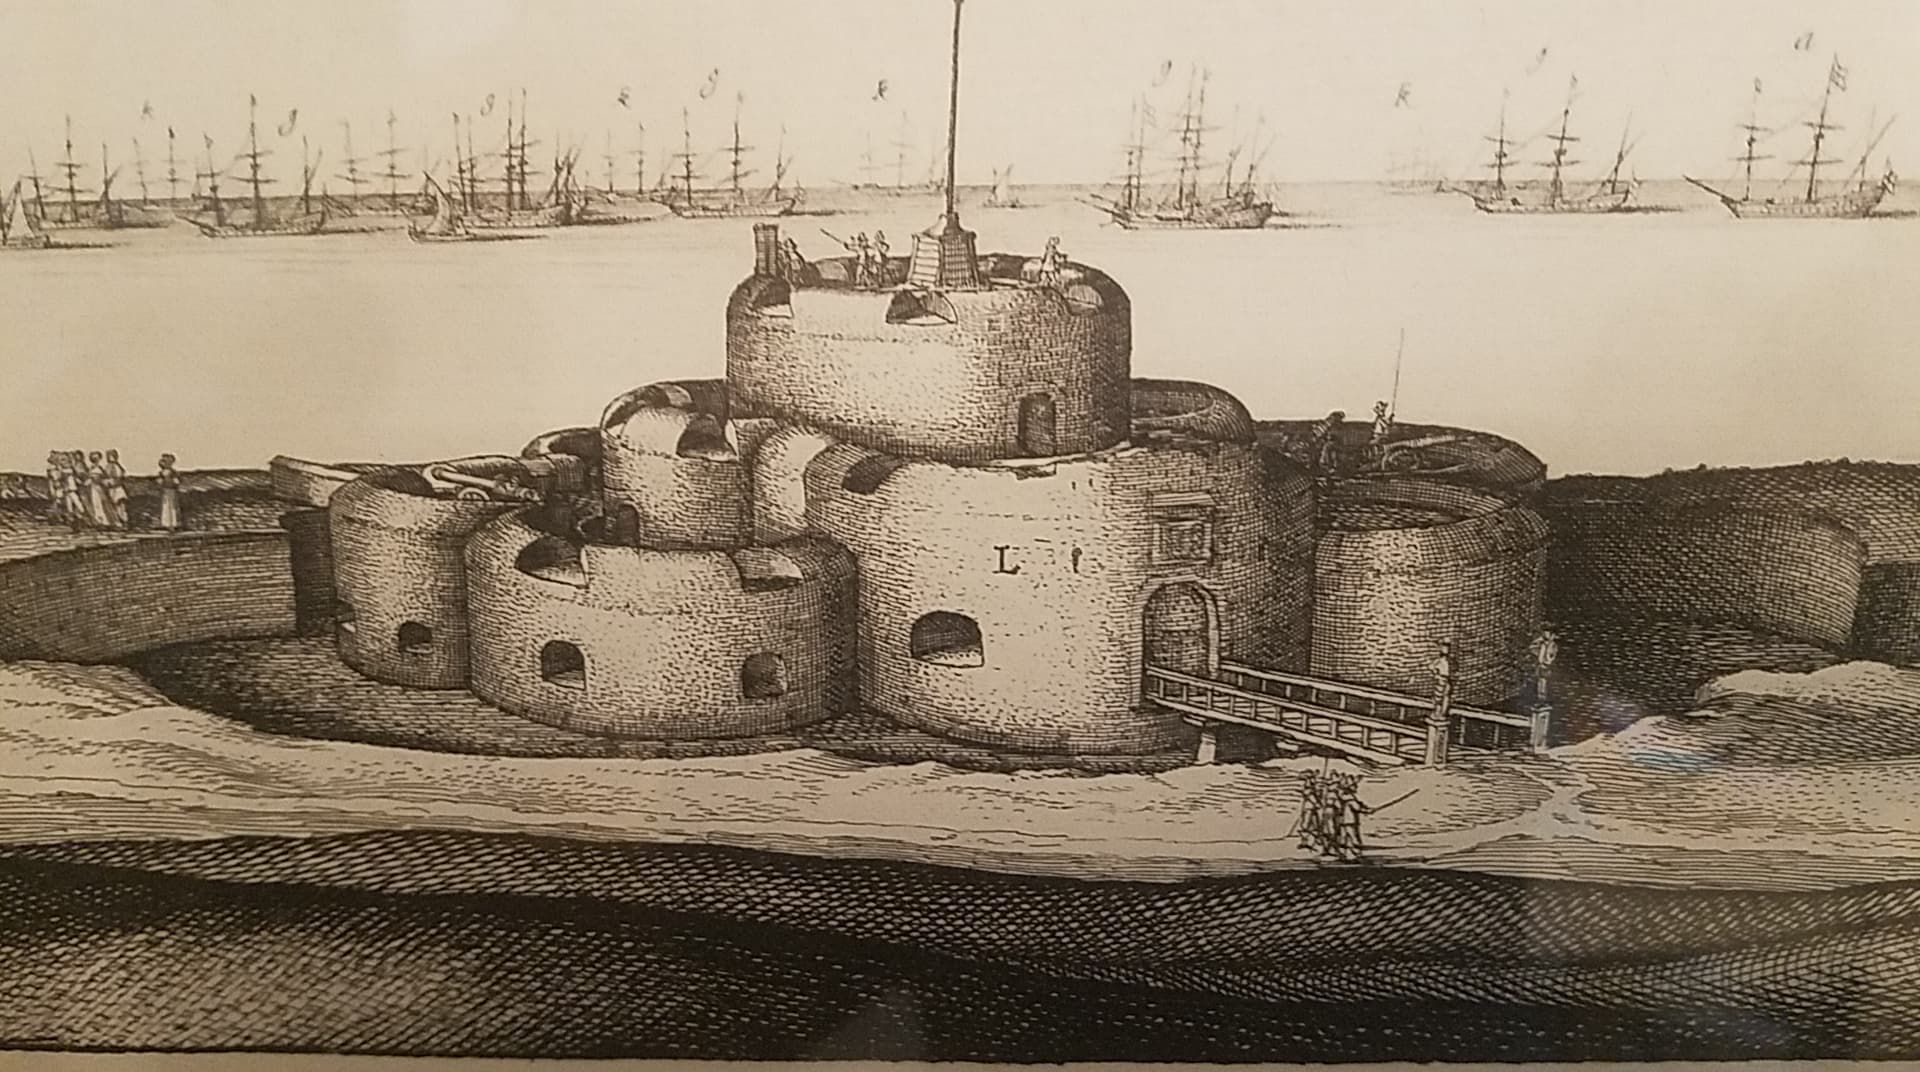
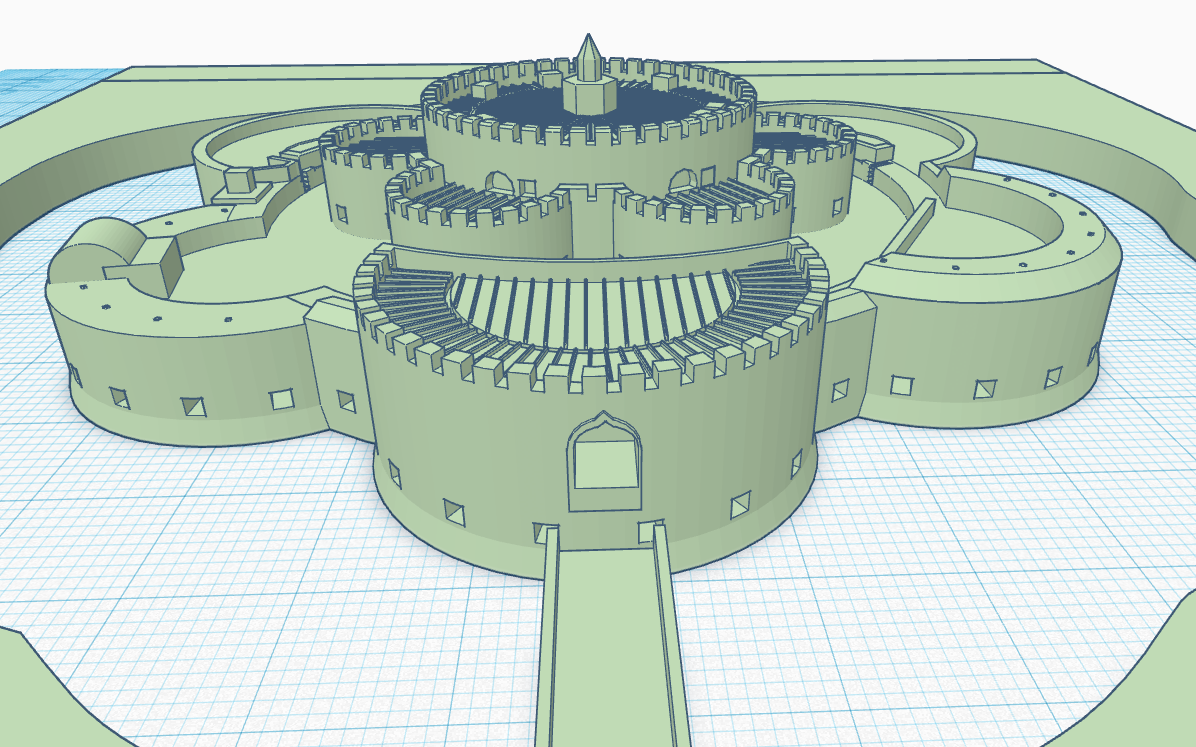
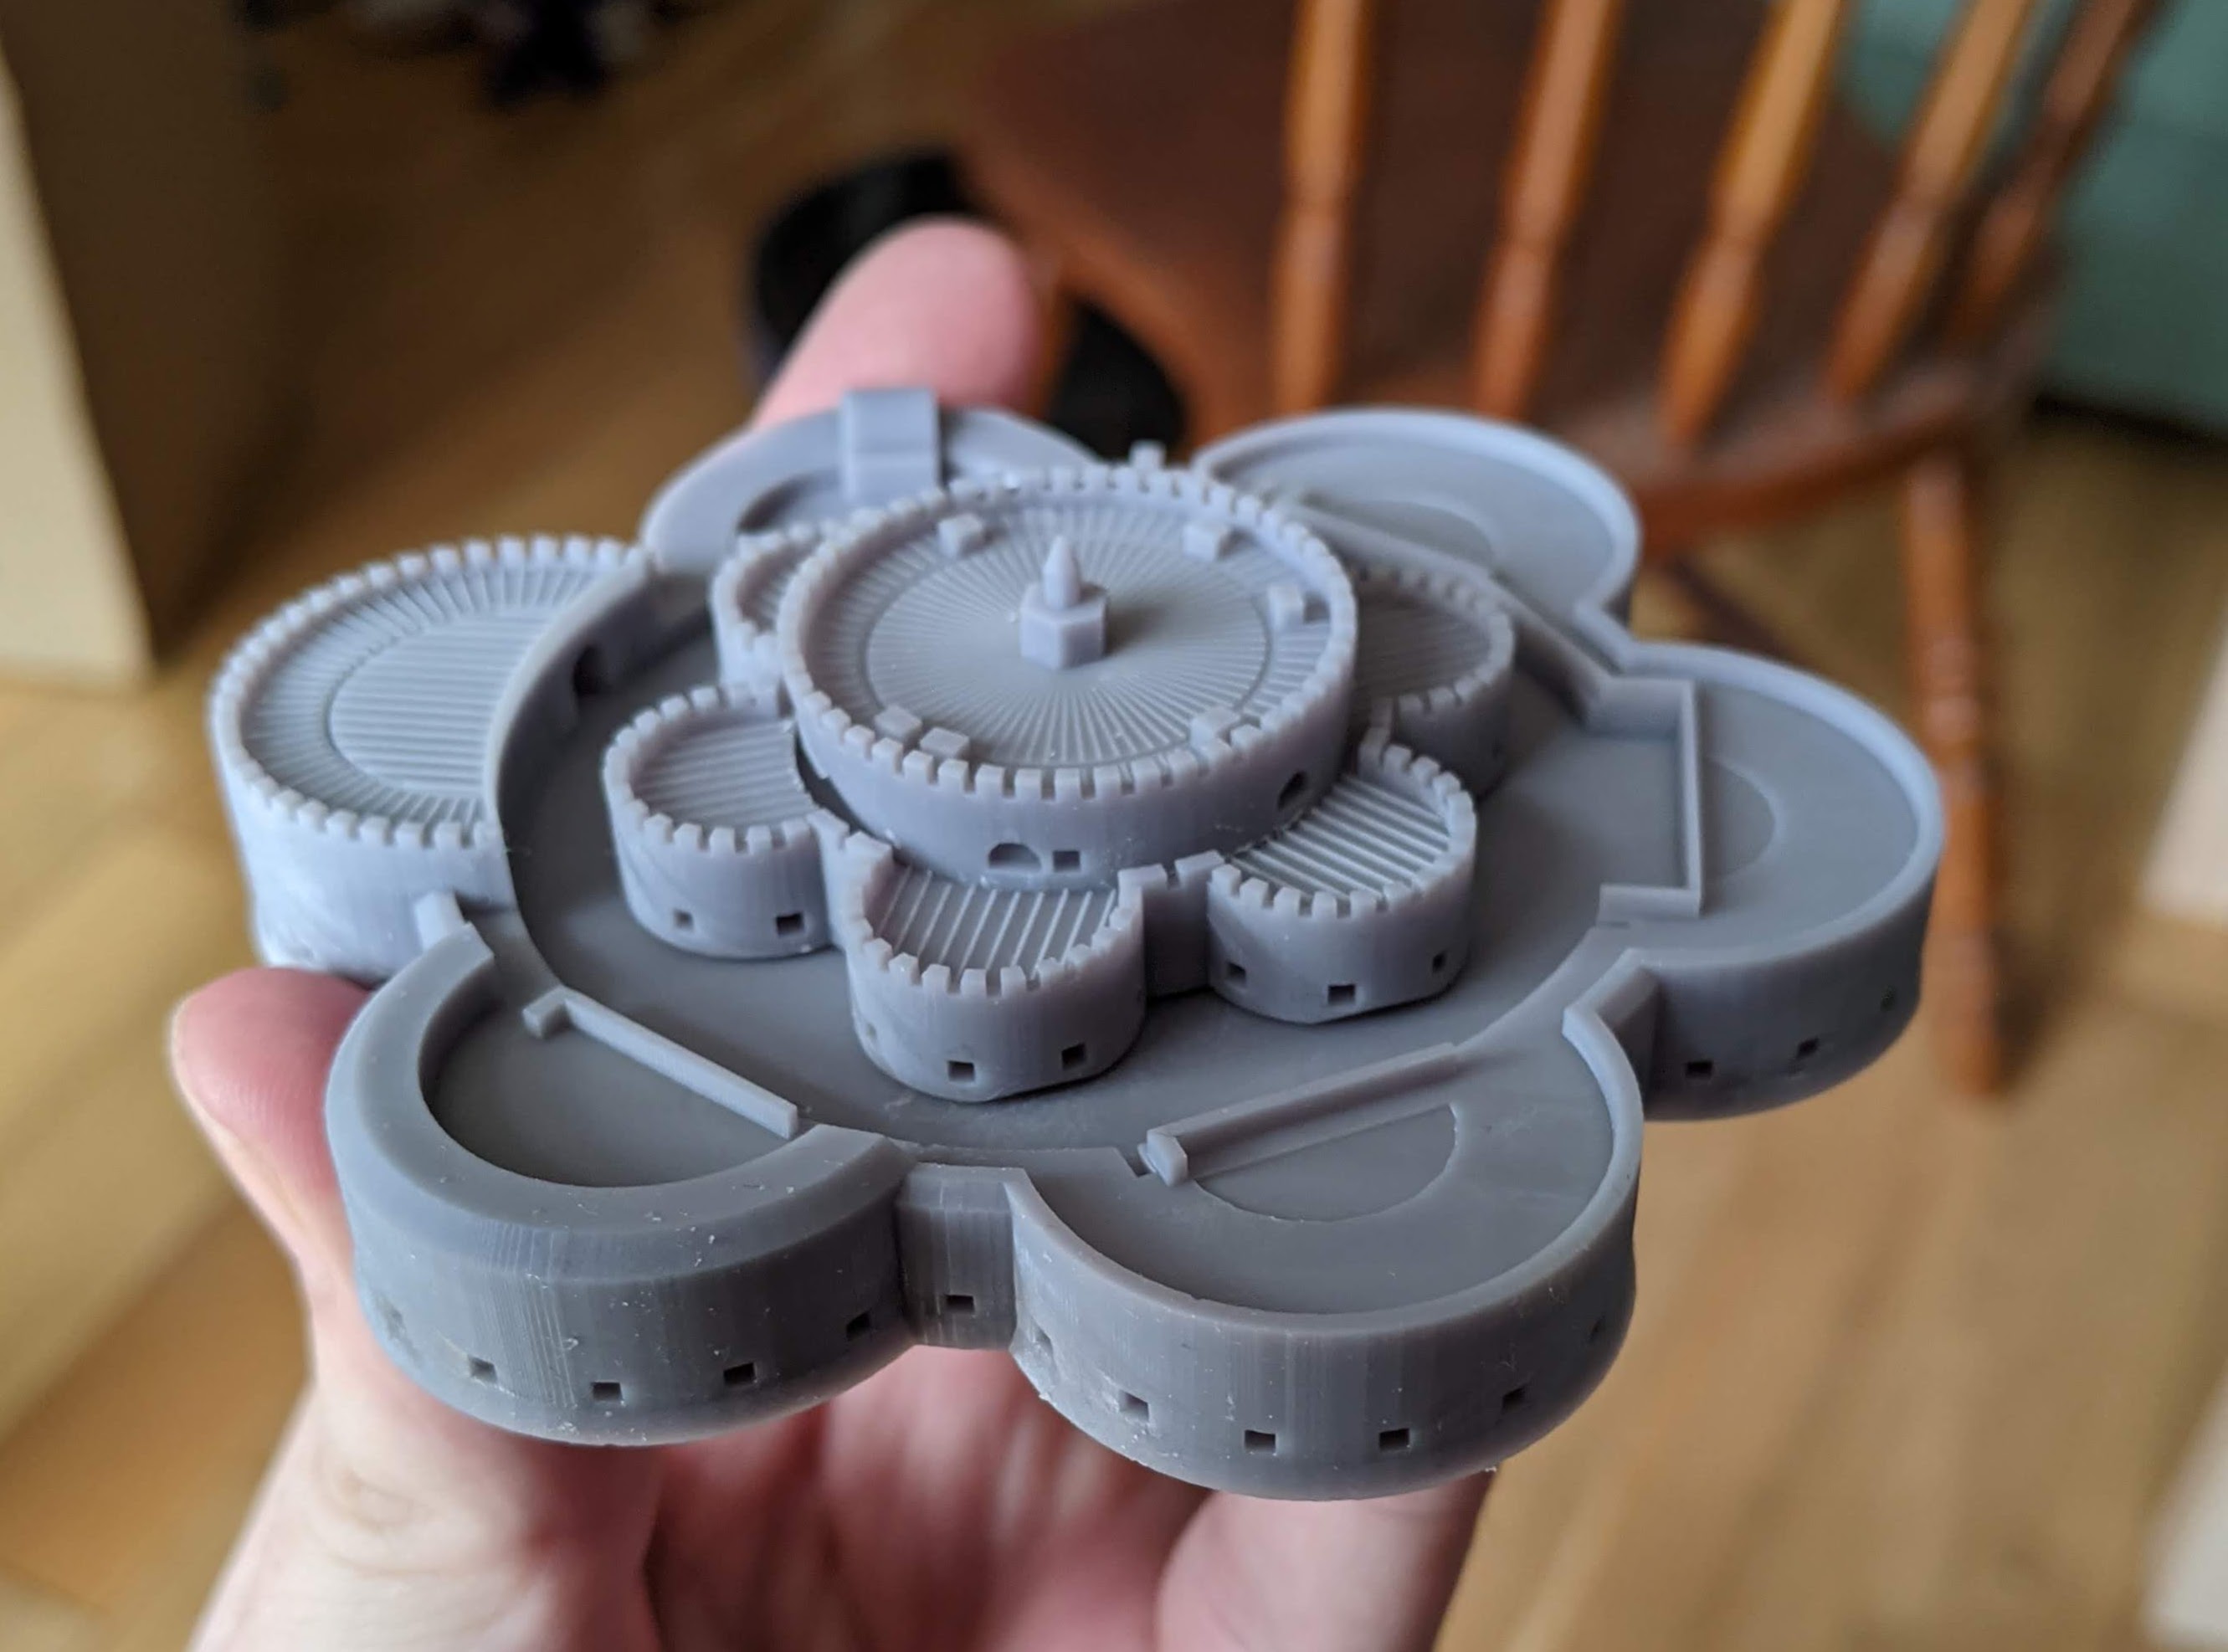
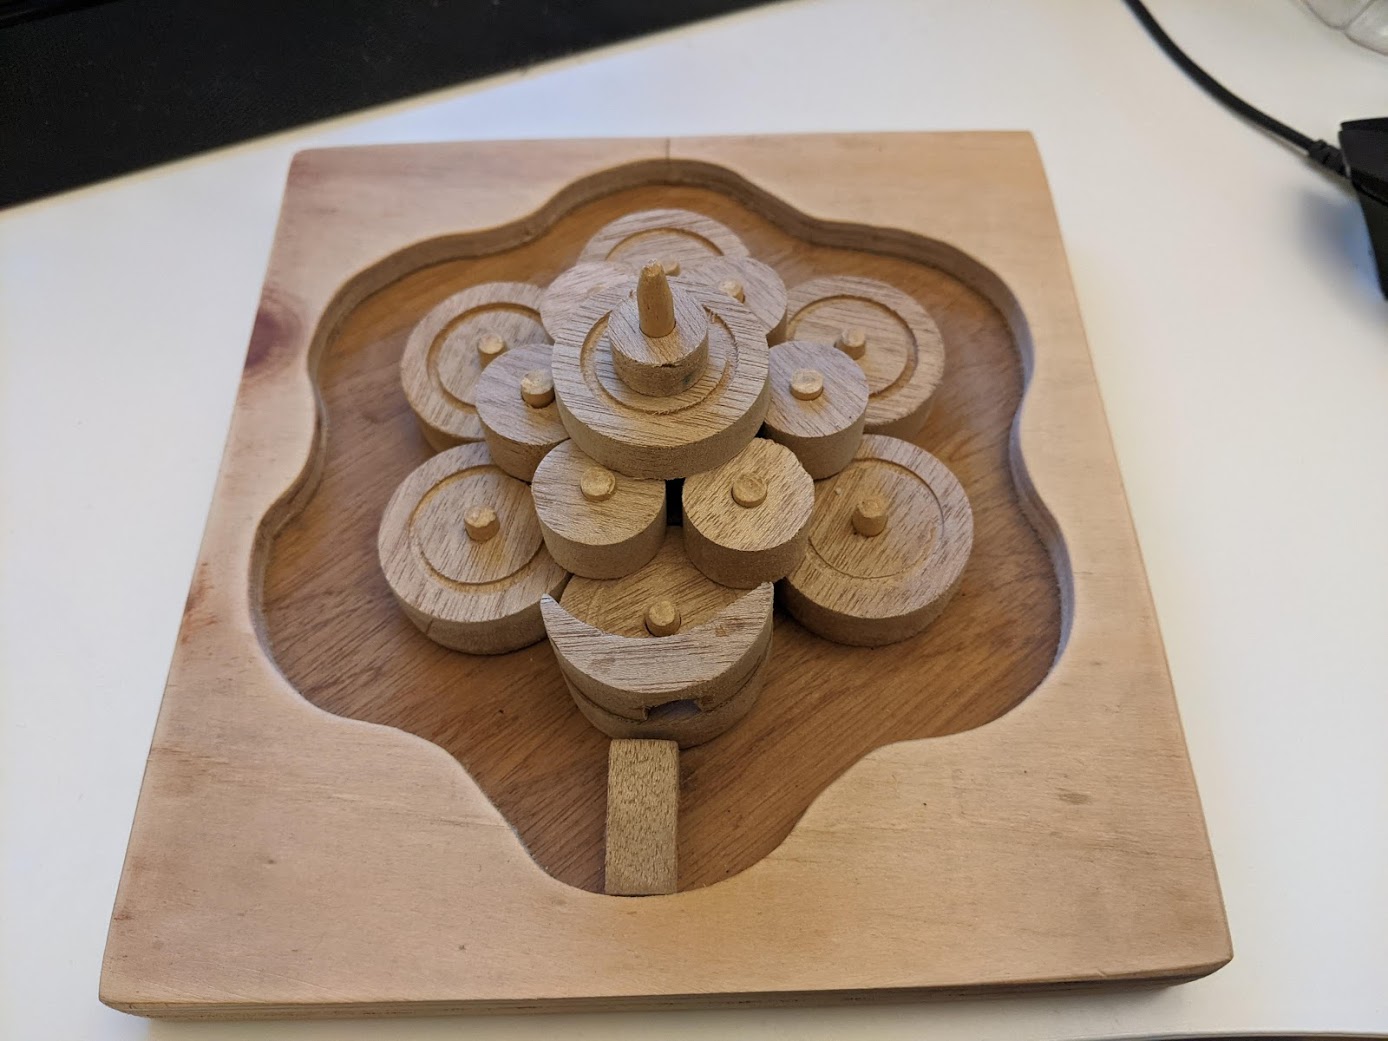
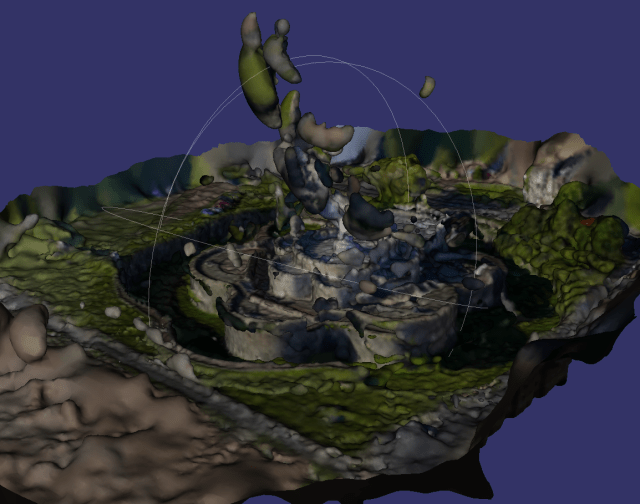
I’ll post separately about St Mawes, that most beautiful and perfect of all Device Forts, but it was a cracking time, and a great pleasure to bring my model right up to the real thing.

Back in Falmouth (the ferry is very regular; children were crablining at the harbour) I refuelled and headed to the National Maritime Museum (Cornwall), a huge weathered-wood structure that recalled the Vasa’s housing in Stockholm. Rather than one galleon, it was absolutely chock full of smaller boats – everything from racing hydroplanes to ornate Maltese dghaisas, preserved fishing boats and a tiny dinghy called “Optimist”. The accompanying galleries deftly told stories of maritime history in general and Falmouth’s in particular. After the Restoration, the town picked up the status of Cornwall’s most important port from Penryn (much to Penryn’s dismay). It was known from late 17th to the early 19th century as the home of “packet ships”, fast mail boats carrying small high-value targets. Falmouth’s location as the first good harbour in the British Isles from the southwest, and a reliable place to send off fast boats rather than worry about the changeable winds up and down the Channel (not to mention hostile warships and pirates) brought it  considerable prosperity. In the 1830s, steamboats (and prolonged peace with France) destroyed these natural advantages and Falmouth’s port instead handled holidaymakers, Cornish emigrants to Australia and the New World, and warships, including acting as the setting-off point for the demented St Nazaire raid of 1942.

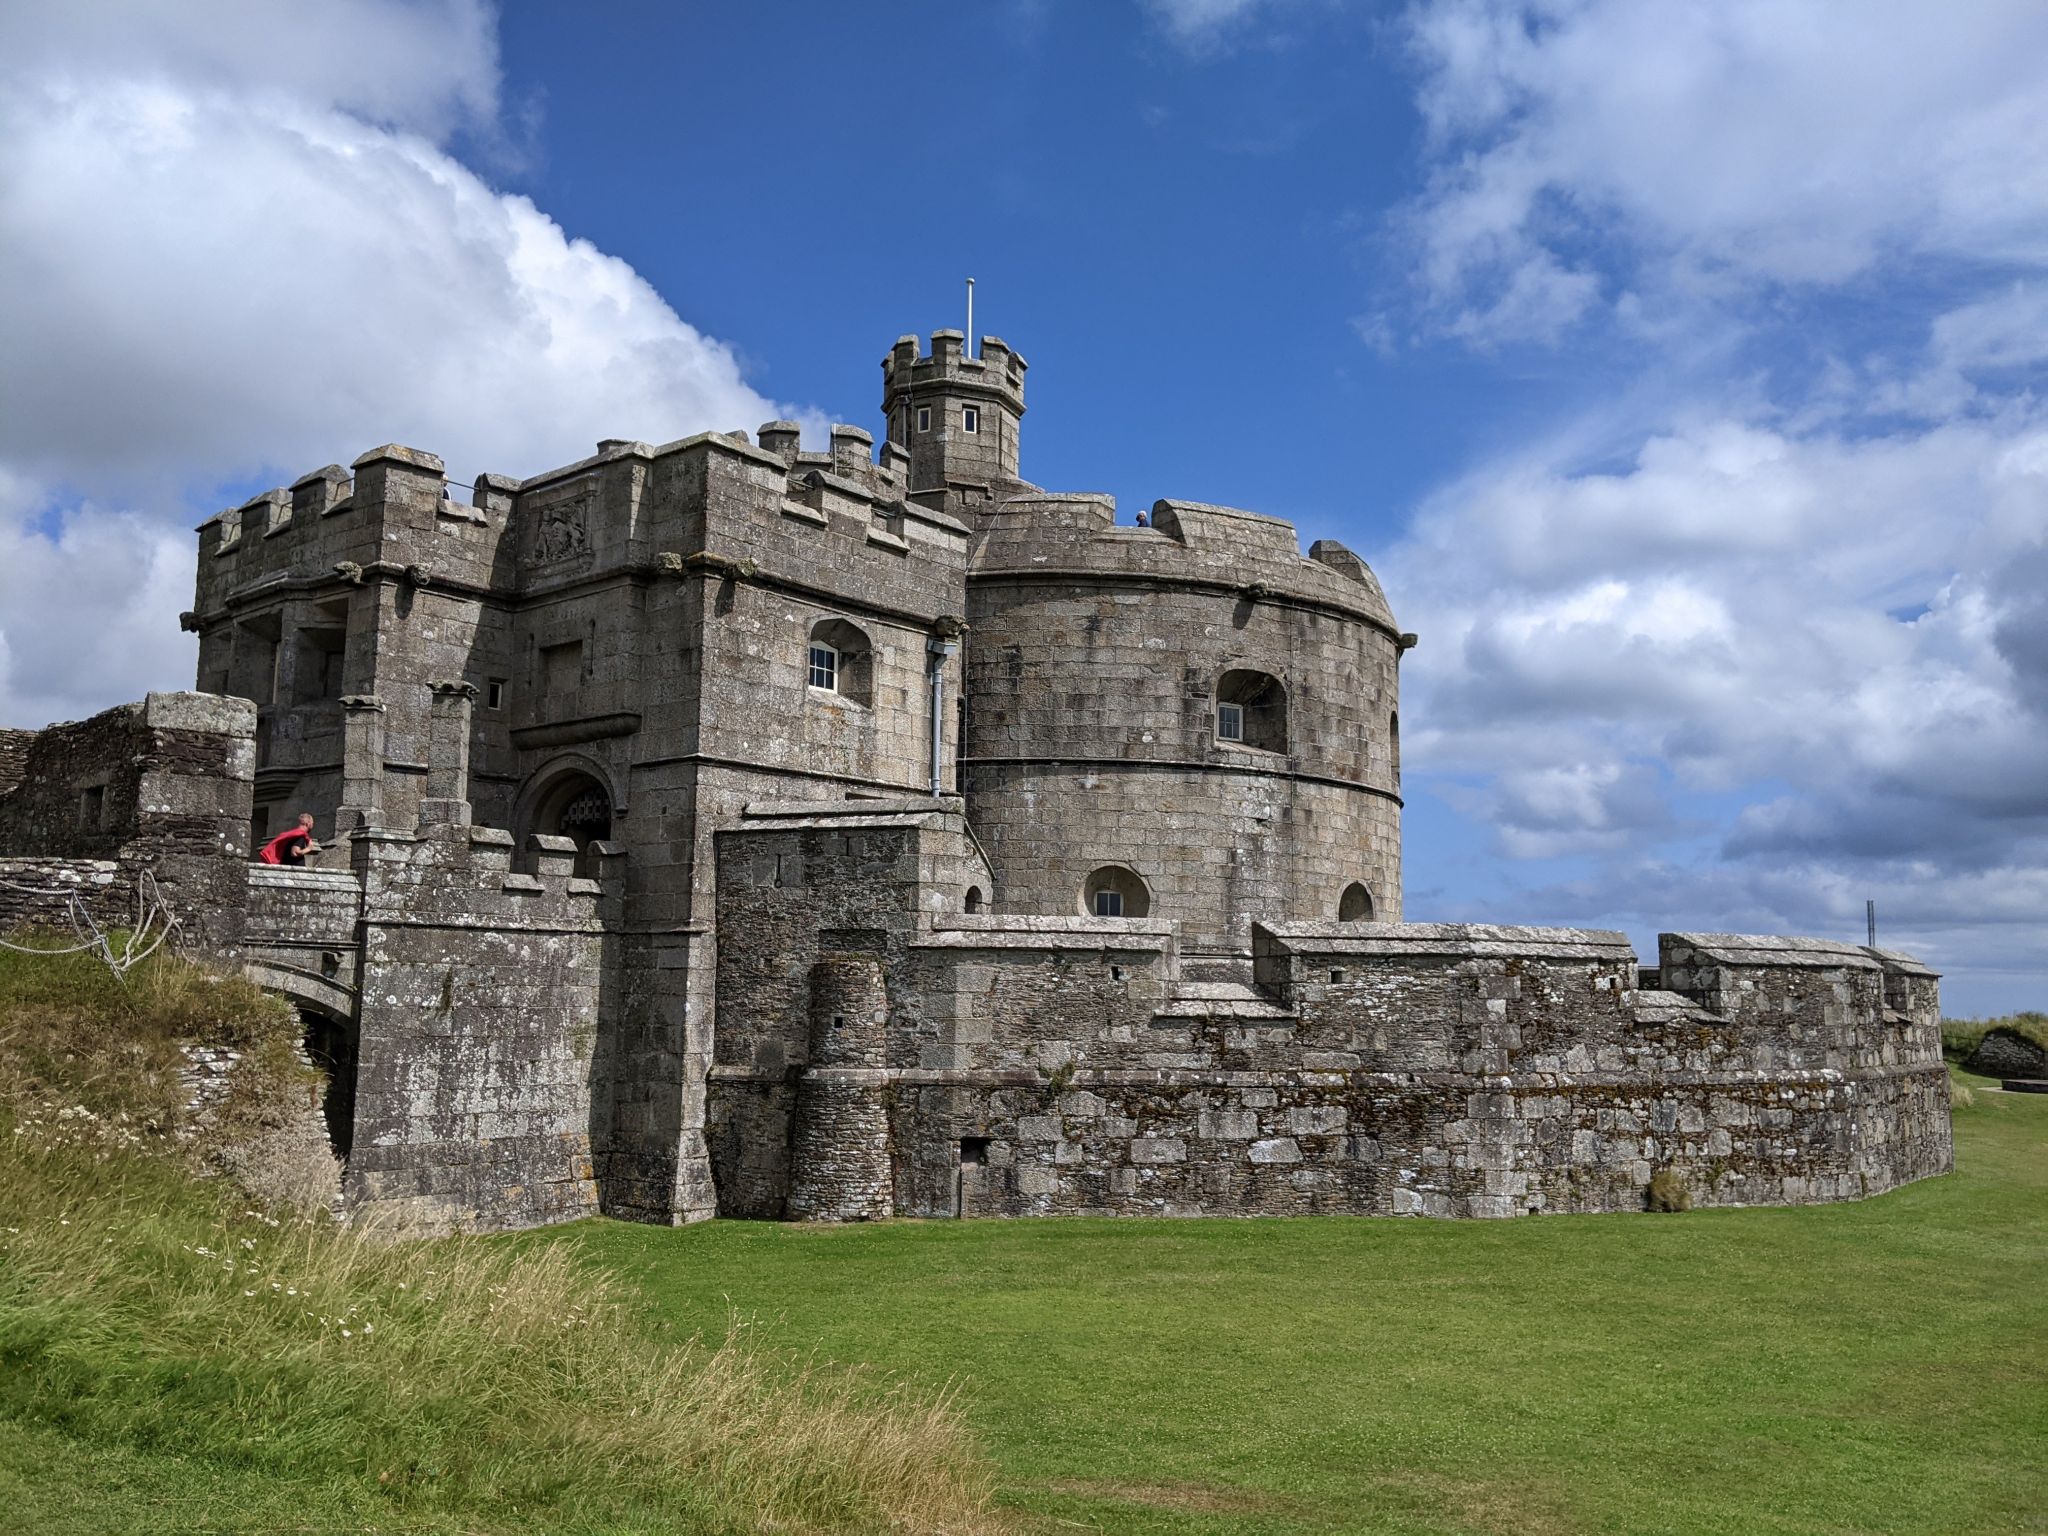
Leaving the museum, a stomp uphill took me into the sudden sunny calm of the west side of the peninsula, and along to Pendennis Castle. Pendennis is one of those marvellous old accretions of defensive architecture, with a Tudor core of similar size and vintage (though very different layout) to St Mawes sitting inside a giant 18th century bastion fort*, with Napoleonic barrack blocks, and that rare sight, Armstrong RMLs on classic looking fortress carriages.

The Tudor gun-fort itself has its original portcullis and the guide pointed out all the modern conveniences of value to the discerning mid-16th century king, like vents for powder smoke and internal loopholes for defence in depth. He also explained that the big square cutout below Henry VIII’s stone coat of arms was for the castle’s warden to put their own coat of arms in wood – a design feature I’d seen on loads of Device Forts but not made sense of before.

The fort’s perimeter has all sorts of wonderful pieces – a Victorian disappearing gun (the mounting wasn’t quite right but got the point across) and a fully equipped WW2 rangefinding station – the metal platforms for the depression rangefinders I’d seen in Gibraltar at last made sense. By using the rangefinder’s handles to aim its telescope at a target, the system would (through careful gearing) put a pointer on the exact location on a large map, giving you a ready-made firing solution. The Cornish translations of all the signs were charming – I now know how to say “dangerous explosives” and “little smasher” in Cornish.

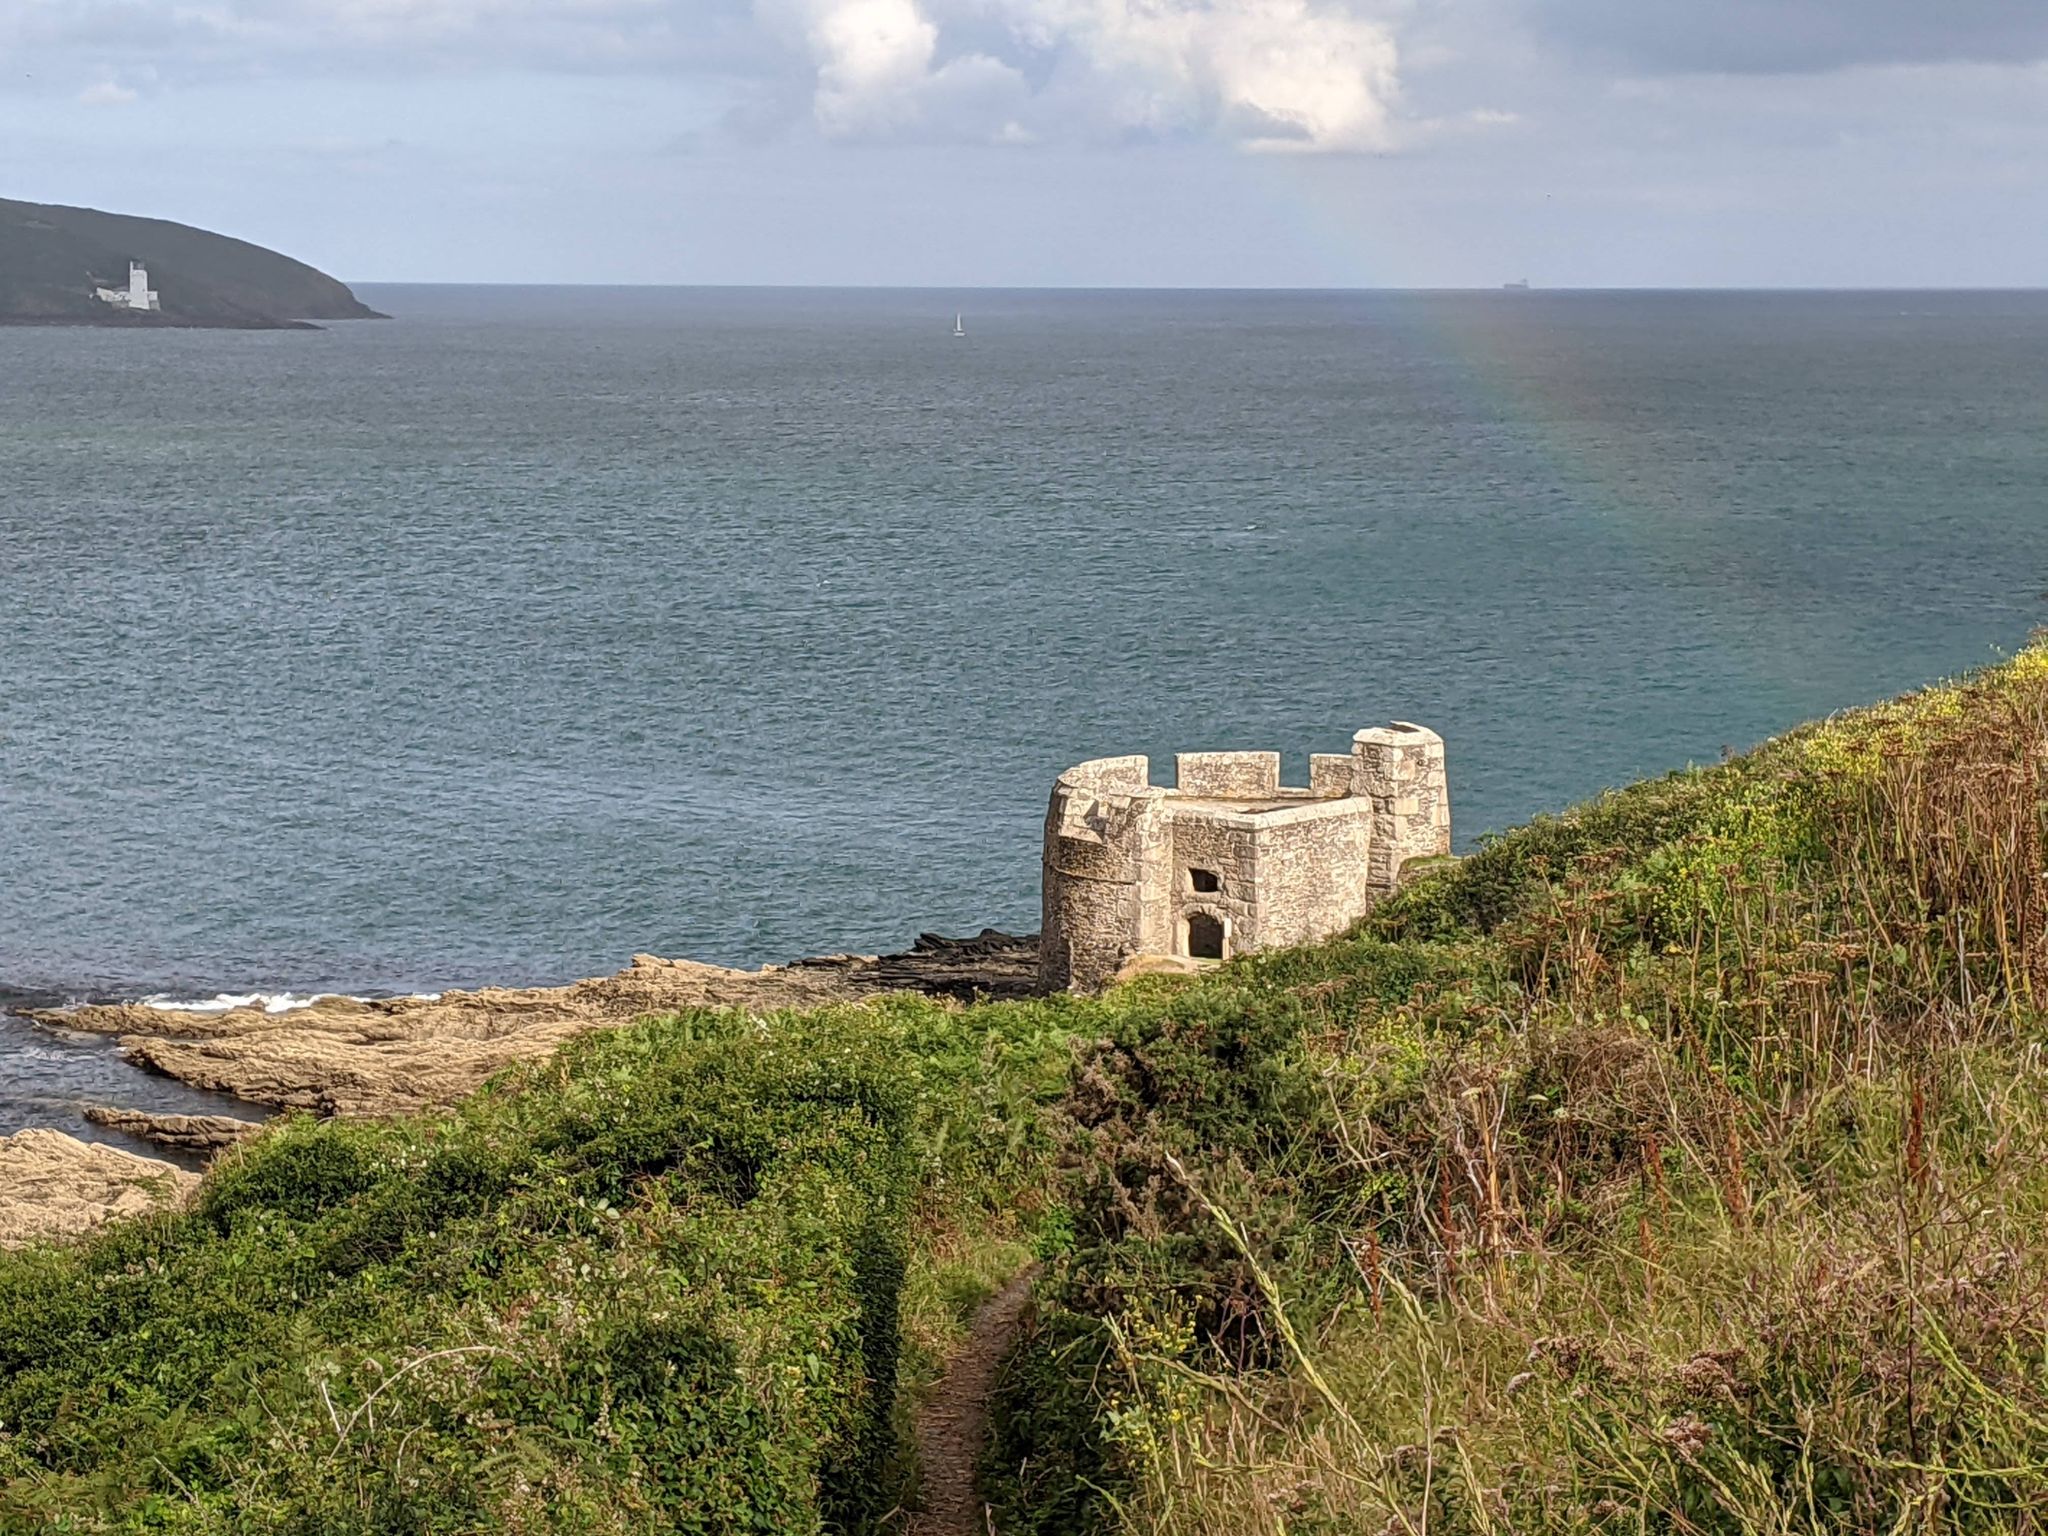
I took a circuit of the great sloping walls and descended to the southernmost point to visit the blockhouse “Little Dennis”, another Henry VIII survivor and one of the best preserved of his blockhouses (less substantial than a proper castle, more permanent than an earthwork battery; think a sort of 16th century pillbox) which now mostly only exist as floor plans. I sat in the main gunport for a while, enjoying the view across the Carrick Roads and the crazed strata of volcanic rock full of tidepools. As I headed back up for a bus home, the clouds, sun and rain conspired for a moment to pick out the blockhouse in glorious golden with a flash of rainbow behind it.


* Falmouth is one of a tiny handful of places in the British Isles with a proper star fort (of which I’ve seen Tilbury, Landguard, Fort George, Berwick-upon-Tweed and the barely-recognisable shambles around Sheerness.)

Out West 2021 

Out to Penryn – St Mawes and Falmouth – St Austell and PlymouthThe Forts of Staddon HeightsDrake’s Island and Saltash Totnes and Exeter


Not a Big Deal, part 3: Left to their Own Devices

If you’d like to purchase any of the results of this history-and-design experiment you can do so at my Etsy store here. Deal is up right now, Walmer will be soon!

“Three Castles of the Downs”, unknown artist, one of my main sources (both directly and for its obvious influence on other sources.) Also, GORGEOUS.

In producing these forts I’m striving to be as accurate as possible, but as any historian knows your conclusion can only be as good as your sources. Deal was ideal for several reasons: the overall structure isn’t nearly as mucked-about-with as other Device Forts (only St Mawes is really completely intact – Southsea and Walmer are barely recognisable) but the English Heritage page on its history is absolutely excellent and has a bunch of primary sources and historical depictions right there. For other castles I had to spend a while delving into other archives, mainly Historic England’s document library and the British Library. I also used some reconstructions in an Osprey book – but that had some problems, more on that later.

Floor plans

Deal Castle current floor plan (courtesy of English Heritage)

EH have a modern, lovely, very clear plan of Deal Castle right on their website, but for Walmer, the relevant page on the EH website is down and the structure has anyway changed much more radically in the last 470 years. In getting the dimensions for the base model and the layout of gunports etc I had to use much older, fuzzier maps; I made detailed measurements via the very old-fashioned expedient of printing off the plans and using a ruler for the relevant measures. (I found this ratio calculator really helpful for on-the-fly calculations.)

Working from a 1725 plan of Walmer Castle, the earliest good one I could find but nearly two centuries after its construction and shows Substantial Structural Mucking About.

Modern superstructure

This was the easiest part to find good sources on, as, writing in the year of our lord 2021, drone overflights of interesting buildings are everywhere (have a look at this guy’s channel of remote Georgian fortresses and monasteries). For Deal I had a large number of high-res photos extracted from the unsuccessful photogrammetry experiment; for Walmer I found, as part of the same photogrammetry research, this exquisite 3d model produced from drone footage (this video, I think) which was itself great for checking tiny details.** However, this meant that I spent an absolutely silly amount of time on the roof tiles, chimneys etc etc which maybe I shouldn’t have.

Tudor superstructure

Three views of Sandown/Walmer before and during their later transformation.

Now, this was much harder! There are loads of contemporary engravings showing the rough shape of the bastions (masonry parapets with rounded tops. and deep angled gunports), but a fair few of these are quite “figurative” and exaggerate certain proportions. Sandown castle was architecturally nearly identical to Walmer, so I had twice as many search terms, but there aren’t a lot of good plans of it about either. I did, however, find an 1860s photograph*** taken before it – as one source wonderfully put it – ‘became sport for the waves’.

I based my design for the ramparts on those on the left, as the design is exactly the same as in paintings and woodcuts but the proportions a little less ‘dramatic’.

I was able, from what little is left of the existing structures, to replicate the battlements and to conjure up a fairly convincing set of dimensions, but something that we may never be certain about is what the central keep looked like (although we know there weren’t any gunports in the sides). I’ve done my best based on the available sources and similar design features in other Device Forts, but it is sadly still a bit speculative.

This is the only really good source I’ve found on both how high the battlements should be and what the original Tudor battlements should look like, from proposed construction work in the 18th century.


Historical Disagreements

Long time readers will be aware of my fondness for Historians’ Disagreements from way back in the A-Z of the IWOME. However, when it comes to assembling something from disparate sources, they are a huge headache! Here are two sources I looked at and dismissed elements of:

This is from the Osprey book linked above (generally quite good) and shows Tudor Walmer as part of a larger defence line. I think the general structure is roughly right but the number of gunports is wrong – it shows three per bastion when all other sources show four. I also think the central tower is too high.

Meanwhile, this is an old engraving of Deal Castle which shows each bastion having two or three huge gunports rather than a bunch of small ones. This horrified me initially – but a fair bit of research, including helpful Youtube videos from tourists in the basement, convinced me that the original gunloops were correct and the engraver here had made a mistake (or not bothered to look closely at Deal’s base and just copied Walmer/Sandown.)This post has already got really quite long, so I think I’m going to split off the bit on 3d printing to a fourth and then polish up some old travelogues for a change. As a final note I’d like to recommend two websites: http://www.starforts.com/ and http://www.fortified-places.com/fortresses.html. I love these sites partly for their content, which is Really Quite Good, and partly because they feel like charming relics of a better, more innocent era of  the internet.*


* Also a time where we as individuals had more agency in choosing what we read, before it was all social meeja algorithms honing your feed for whatever makes you angriest. I realise this sort of whinge permanently consigns me to the ash-heap of crotchety old men railing against scary new changes, but what we have now really is terrible.

** But it says ‘free download 3d model’, I hear you cry – why not extract this and work from there? Because, being based on photogrammetry techniques, this is both more detailed and lower ‘resolution’ than I need, and uses a mixture of the model and textures to achieve visual fidelity. If I tried to 3d print this, it would have a chaotic mushiness to it – the overall shape would be OK but the fine detail would be no good for my purposes.

*** Wonderfully, this is from a local history site talking about pubs: http://www.dover-kent.com/Good-Intent-Sandown.html

Not a Big Deal, part 2: Tinkering with CAD

The Devices. I realised after posting these photos that Walmer/Sandown is actually slightly off scale due to an error in conversions (it should be about 7/10ths the width of Deal.) Ho hum.

There are an awful lot of 3d modelling tools out there; some are free, some are very expensive, almost all of them are quite intimidating. I took the lead from a chap on the Mortal Engines server, Alec Matthews (who makes magnificent little models for model railways and is the one who inspired me to get into 3d printing at all, really) and started using Tinkercad. I got a bit of stick in other channels for this as “baby’s first 3d design package”, but that’s fine because I’m a baby and this is my first 3d design package.

Tinkercad is free, web-based, and has one real pecularity: rather than the more common draw-and-extrude model, you can only create “negative” and “positive” 3d polygons and apply them to each other. So to make a more complex shape, like a Tudor arch, you need to construct it out of other simpler polygons and combine them; to make a crenellated tower, you need to create a cylinder, a smaller “negative” cylinder inside to cut it out, and then a lot of little cutout bits for the crenels themselves.

Two attempts at a Tudor arch in this system: the first a very poor showing using a rectangle for the doorway, a flattened cylinder for the arch, and a rotated square for the point. The second, after looking into the actual architectural principles of Tudor arches, correctly uses two cylinders for the corners of the arch, a flattened square for the centre, and two more squares to create the doorway and fill in the gaps. These parts can then be combined into an “object” which can be used, positive or negative, to create appropriately shaped holes in things.

This is about as far as I got with the hand-drawn stuff; I was close to giving up and trying a more advanced tool when I discovered Codeblocks. Tinkercad has a function where, rather than wiggle lots of polygons around with keyboard & mouse, you can use code (pre-assembled blocks rather than actually typing it) to create polygons, move them around and apply them to each other. Like a lot of things about Tinkercad, it’s got a difficult, unpolished UI and a Fisher-Price aesthetic, but it’s also very easy to pick up.*

This is how that turret up there was made, for instance. (I’ve actually discovered a more elegant way of doing crenellations since, but this was about day two.)

Tinkercad’s limitations aside, this is ideal for repeated geometric structures like the Device Forts. It took about a week of tweaking Deal Castle into multiple stages and assembling the final parts “by hand” (there’s a limit of 200 ‘primitives’ in each codeblocks setup which limits quite how elaborate you can be), but the end results were really quite pleasing.

I realise posting this screenshot that it has a problem with the alignment of the gate, which I fixed in the final model but never took a picture of. Ho hum.

I am going to have to bite the bullet and learn a better tool one day, but for now it’s enough. The eagle-eyed among you will note that there are actually three castles up at the top, of rather different configurations, and next week I’m going to talk about the experience of 3d printing and every good historian’s favourite topic, SOURCES.

The tiny nubbles on the two lower bastions flanking the gatehouse are too small to come up in my 3d prints, but they’re THERE.

* There is something irritatingly half-arsed about the implementation of a lot of features in Codeblocks; in particular, the way it handles shapes which aren’t cylinders or cuboids is absolutely demented. You create a “polygon” and you can determine its shapes and smoothness, but you can’t actually set a size for it, only apply a “scale” modifier which doesn’t correspond to any actual units. It’s purely eyeballing and trial-and-error to get it to the right size.

Not A Big Deal, part 1: Photogrammetry

I’ve taught myself something new: here is a very tiny Deal Castle, made entirely by me!

This is the very first print, with some design flaws that I’ve now resolved. But more on that later.

Back in the Before-Times, a beloved uncle who lives in Walmer gave me this handmade wooden model of Deal Castle as a wedding gift, which is really how this all started.

I love the Device Forts – they’re a bit before my usual historical period, but a striking, wonderful missing link between classic medieval castles and proper trace italienne gunpowder forts. I’ve always been quite keen on making tiny models, but unfortunately dyspraxia makes me far too clumsy for the sort of fine detail work  So, inspired by various goings-on, including a friend on a Discord server having fun with his new 3d printer, I wondered if I could instead try my hand at crafting 3d models on a computer and leave the difficult “producing this in real life” part to machines. This coincided with me hearing about a technique called photogrammetry.

Photogrammetry in its essence is “using a number of pictures of something to work out how it looks in its entirety”, but digital photogrammetry is a recent and very interesting technique of feeding a lot of separate digital photos of something into software which assembles a 3d model of it (complete with textures.) Rather than a LIDAR-based scan, the physical shape of the object is determined just from the photos. It’s been used for various things, including making scenery in computer games, for archaeology, for budget production of 3d models in the heritage sector, and just for fun – I really recommend David Fletcher’s twitter for some examples of what can be done.
My very first attempt!
So I started (having had a good long google session to determine that this wouldn’t be terribly breaching the relevant netiquette) with a lovely drone video of Deal Castle on Youtube by Oszibusz. (Actually, I had to download the video, then run it through another piece of software to cut it unto hundreds of individual photos, but that’s by the by.) Putting this through Regard3d, a free and reasonably sophisticated piece of, didn’t take too long and immediately gave an encouraging if rather mushy, lumpy result.

Genuinely no idea how this happened.
I started looking into other packages, but realised that my computer – while fine for games – had the wrong kind of graphics card for other photogrammetry tools (most of which are also quite expensive). And I was ultimately convinced, from various photogrammetry examples I was finding (including this astonishingly good Walmer Castle, just up the road) that this technique just wasn’t going to do what I want it to (produce good enough models to 3d print).

So, it was time to teach myself some CAD instead…