Click the images for full-size versions! And if you’re interested in any of the pins you see below, you can get them at my Etsy shop here.
The Frog Zone. (More permanent labels on the little shelves to follow.)
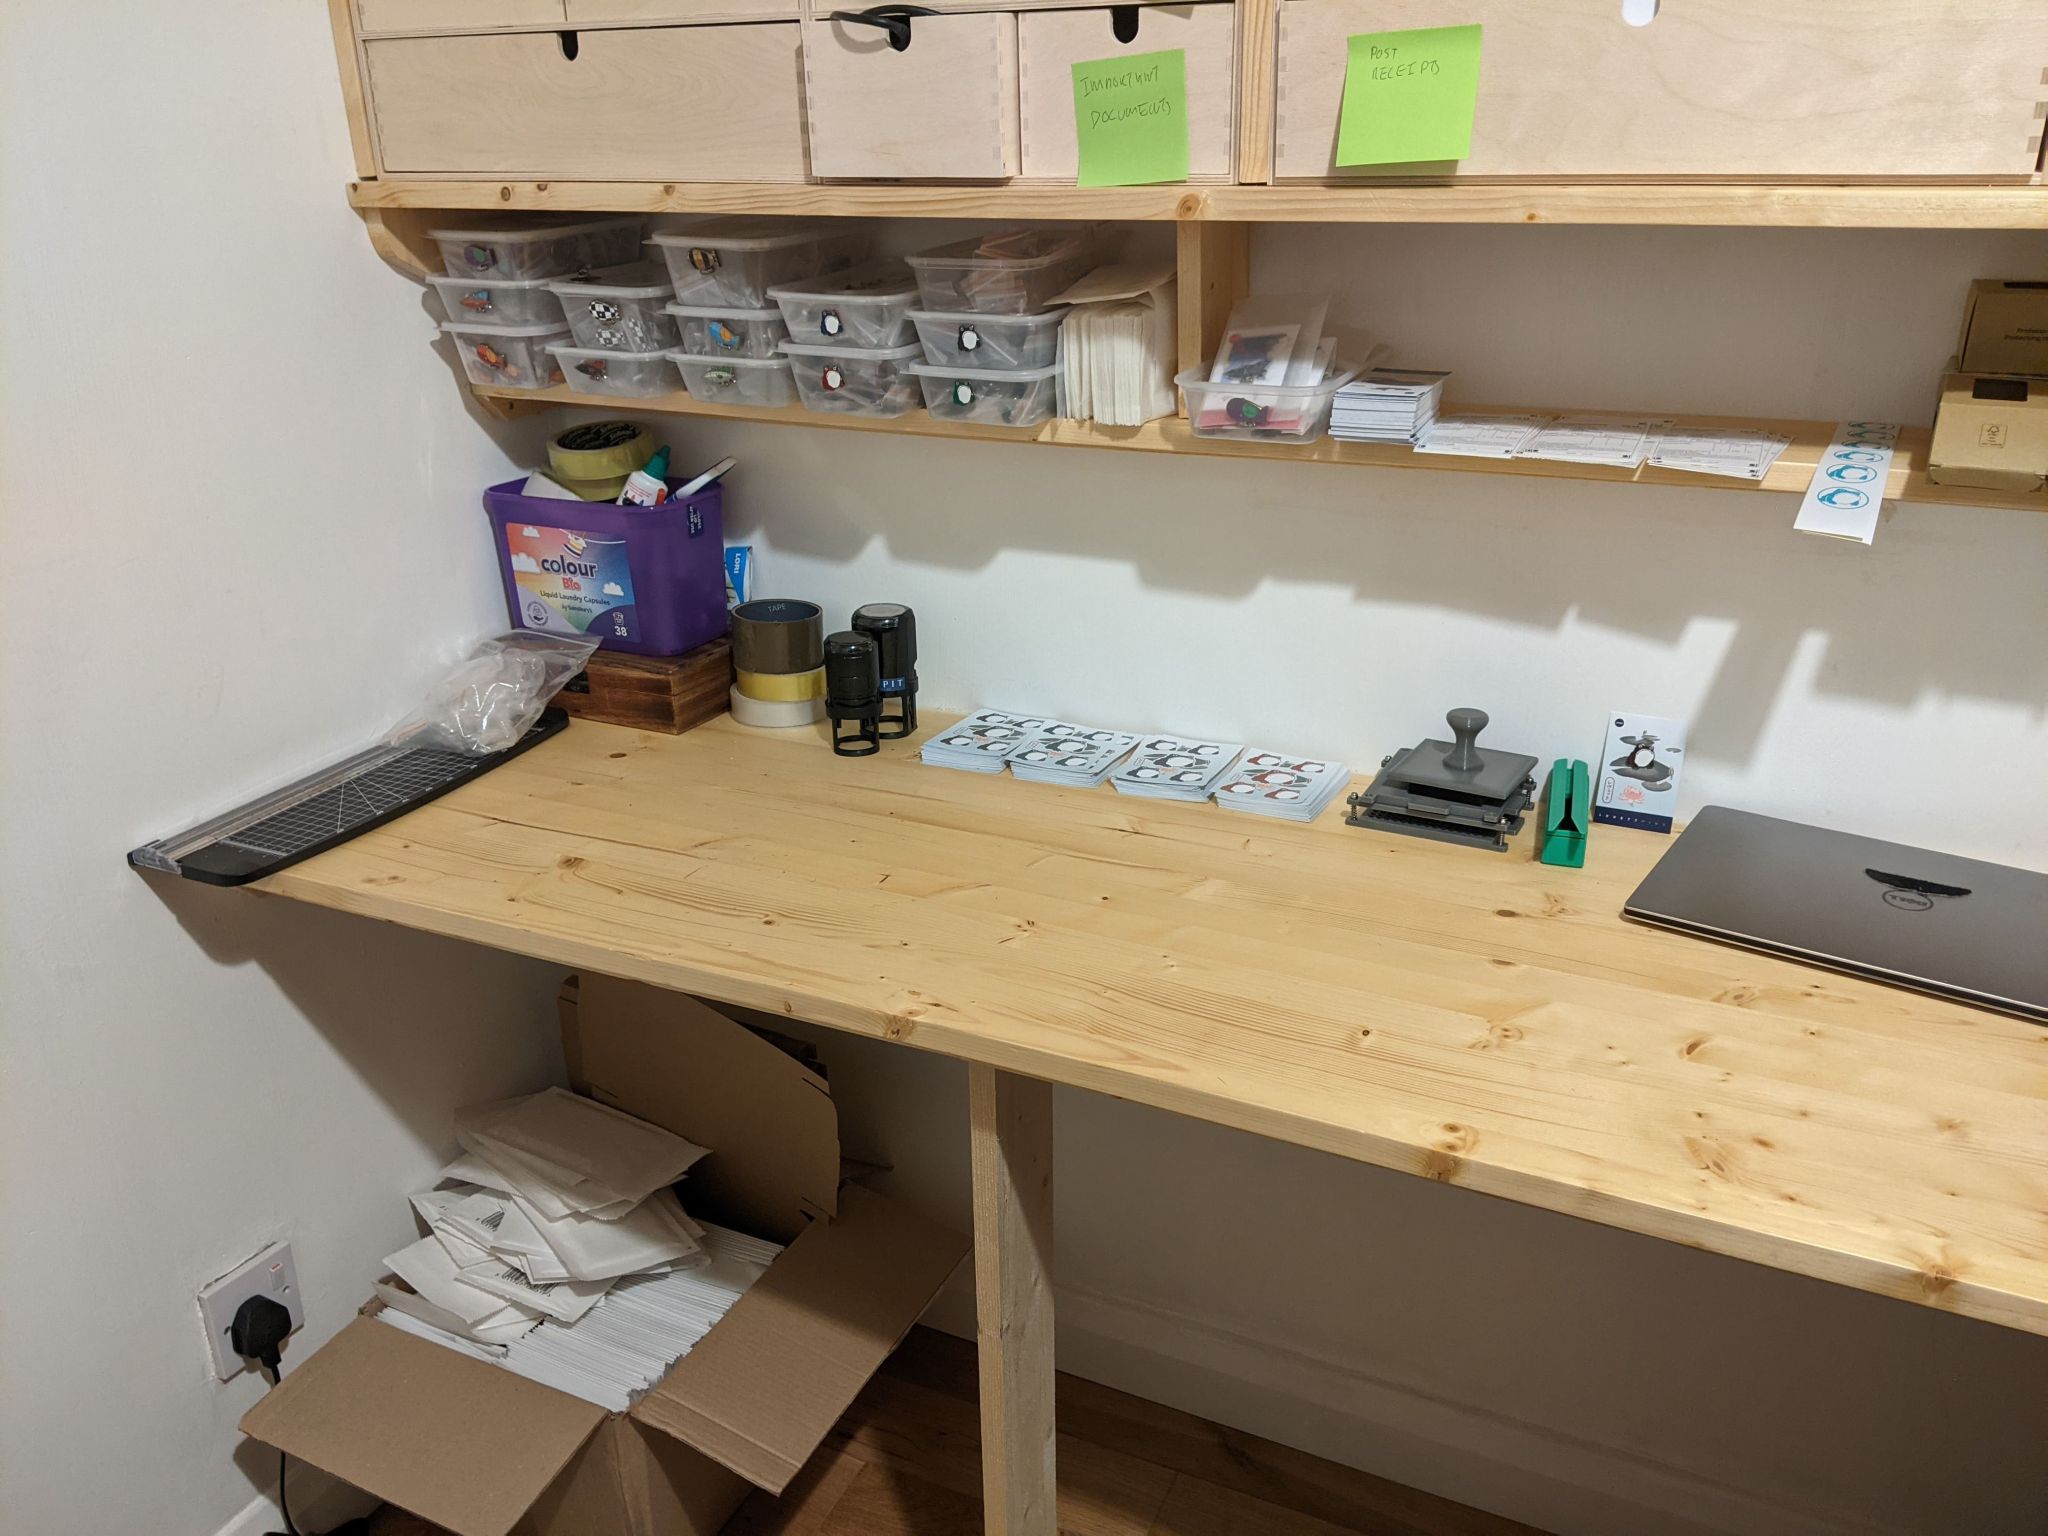
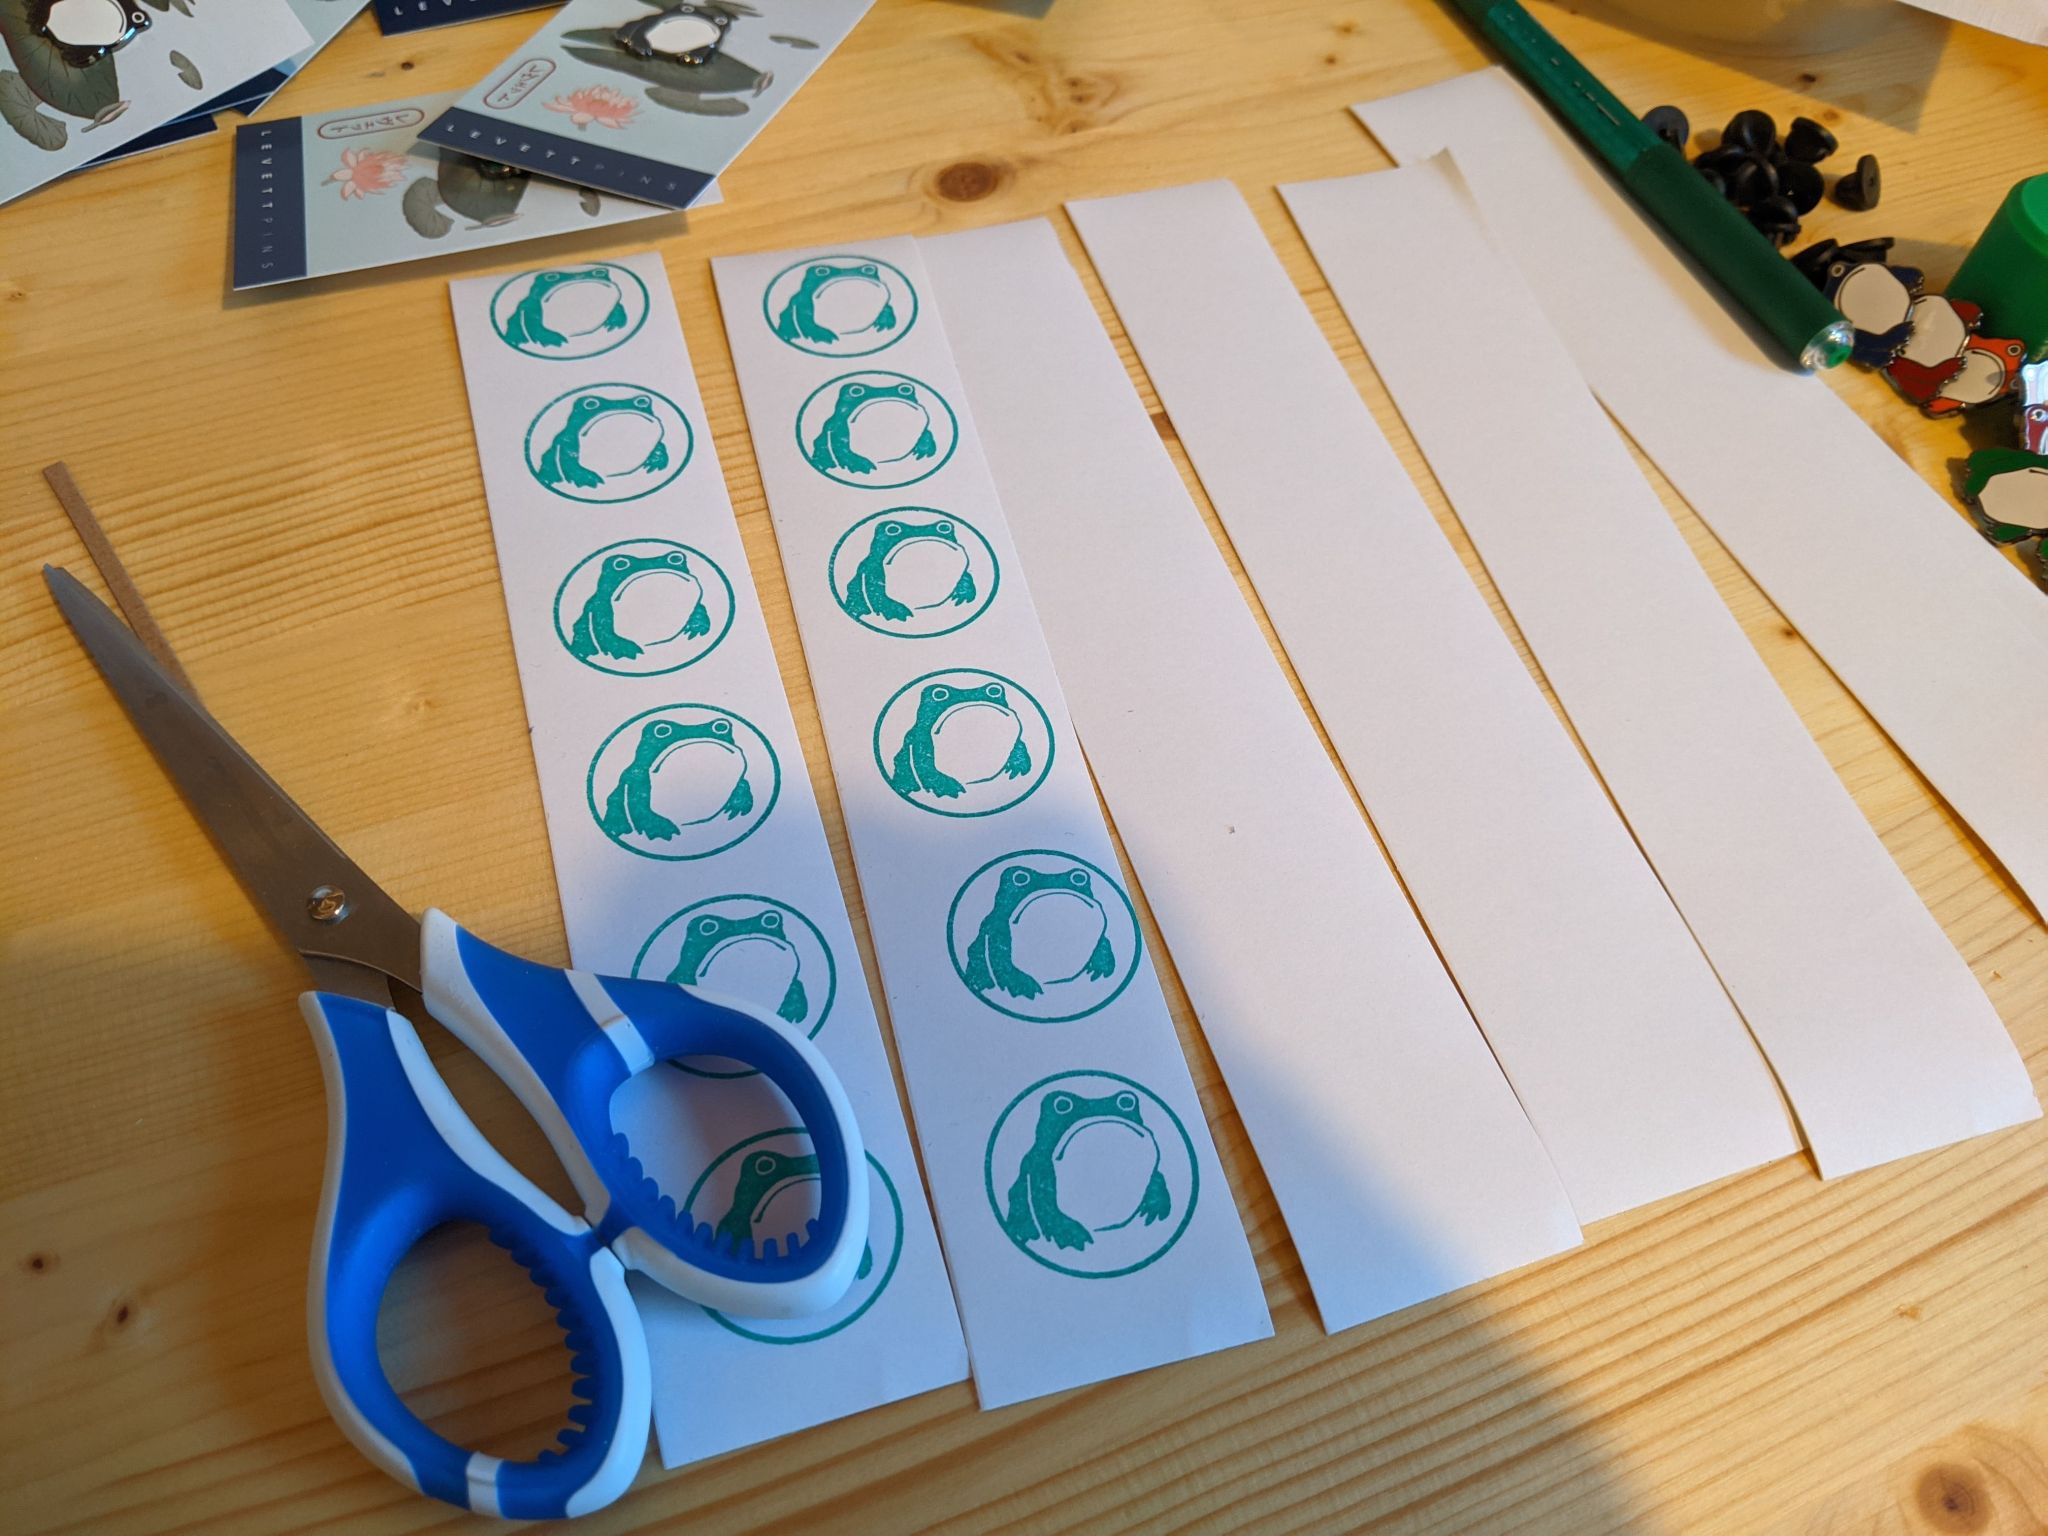
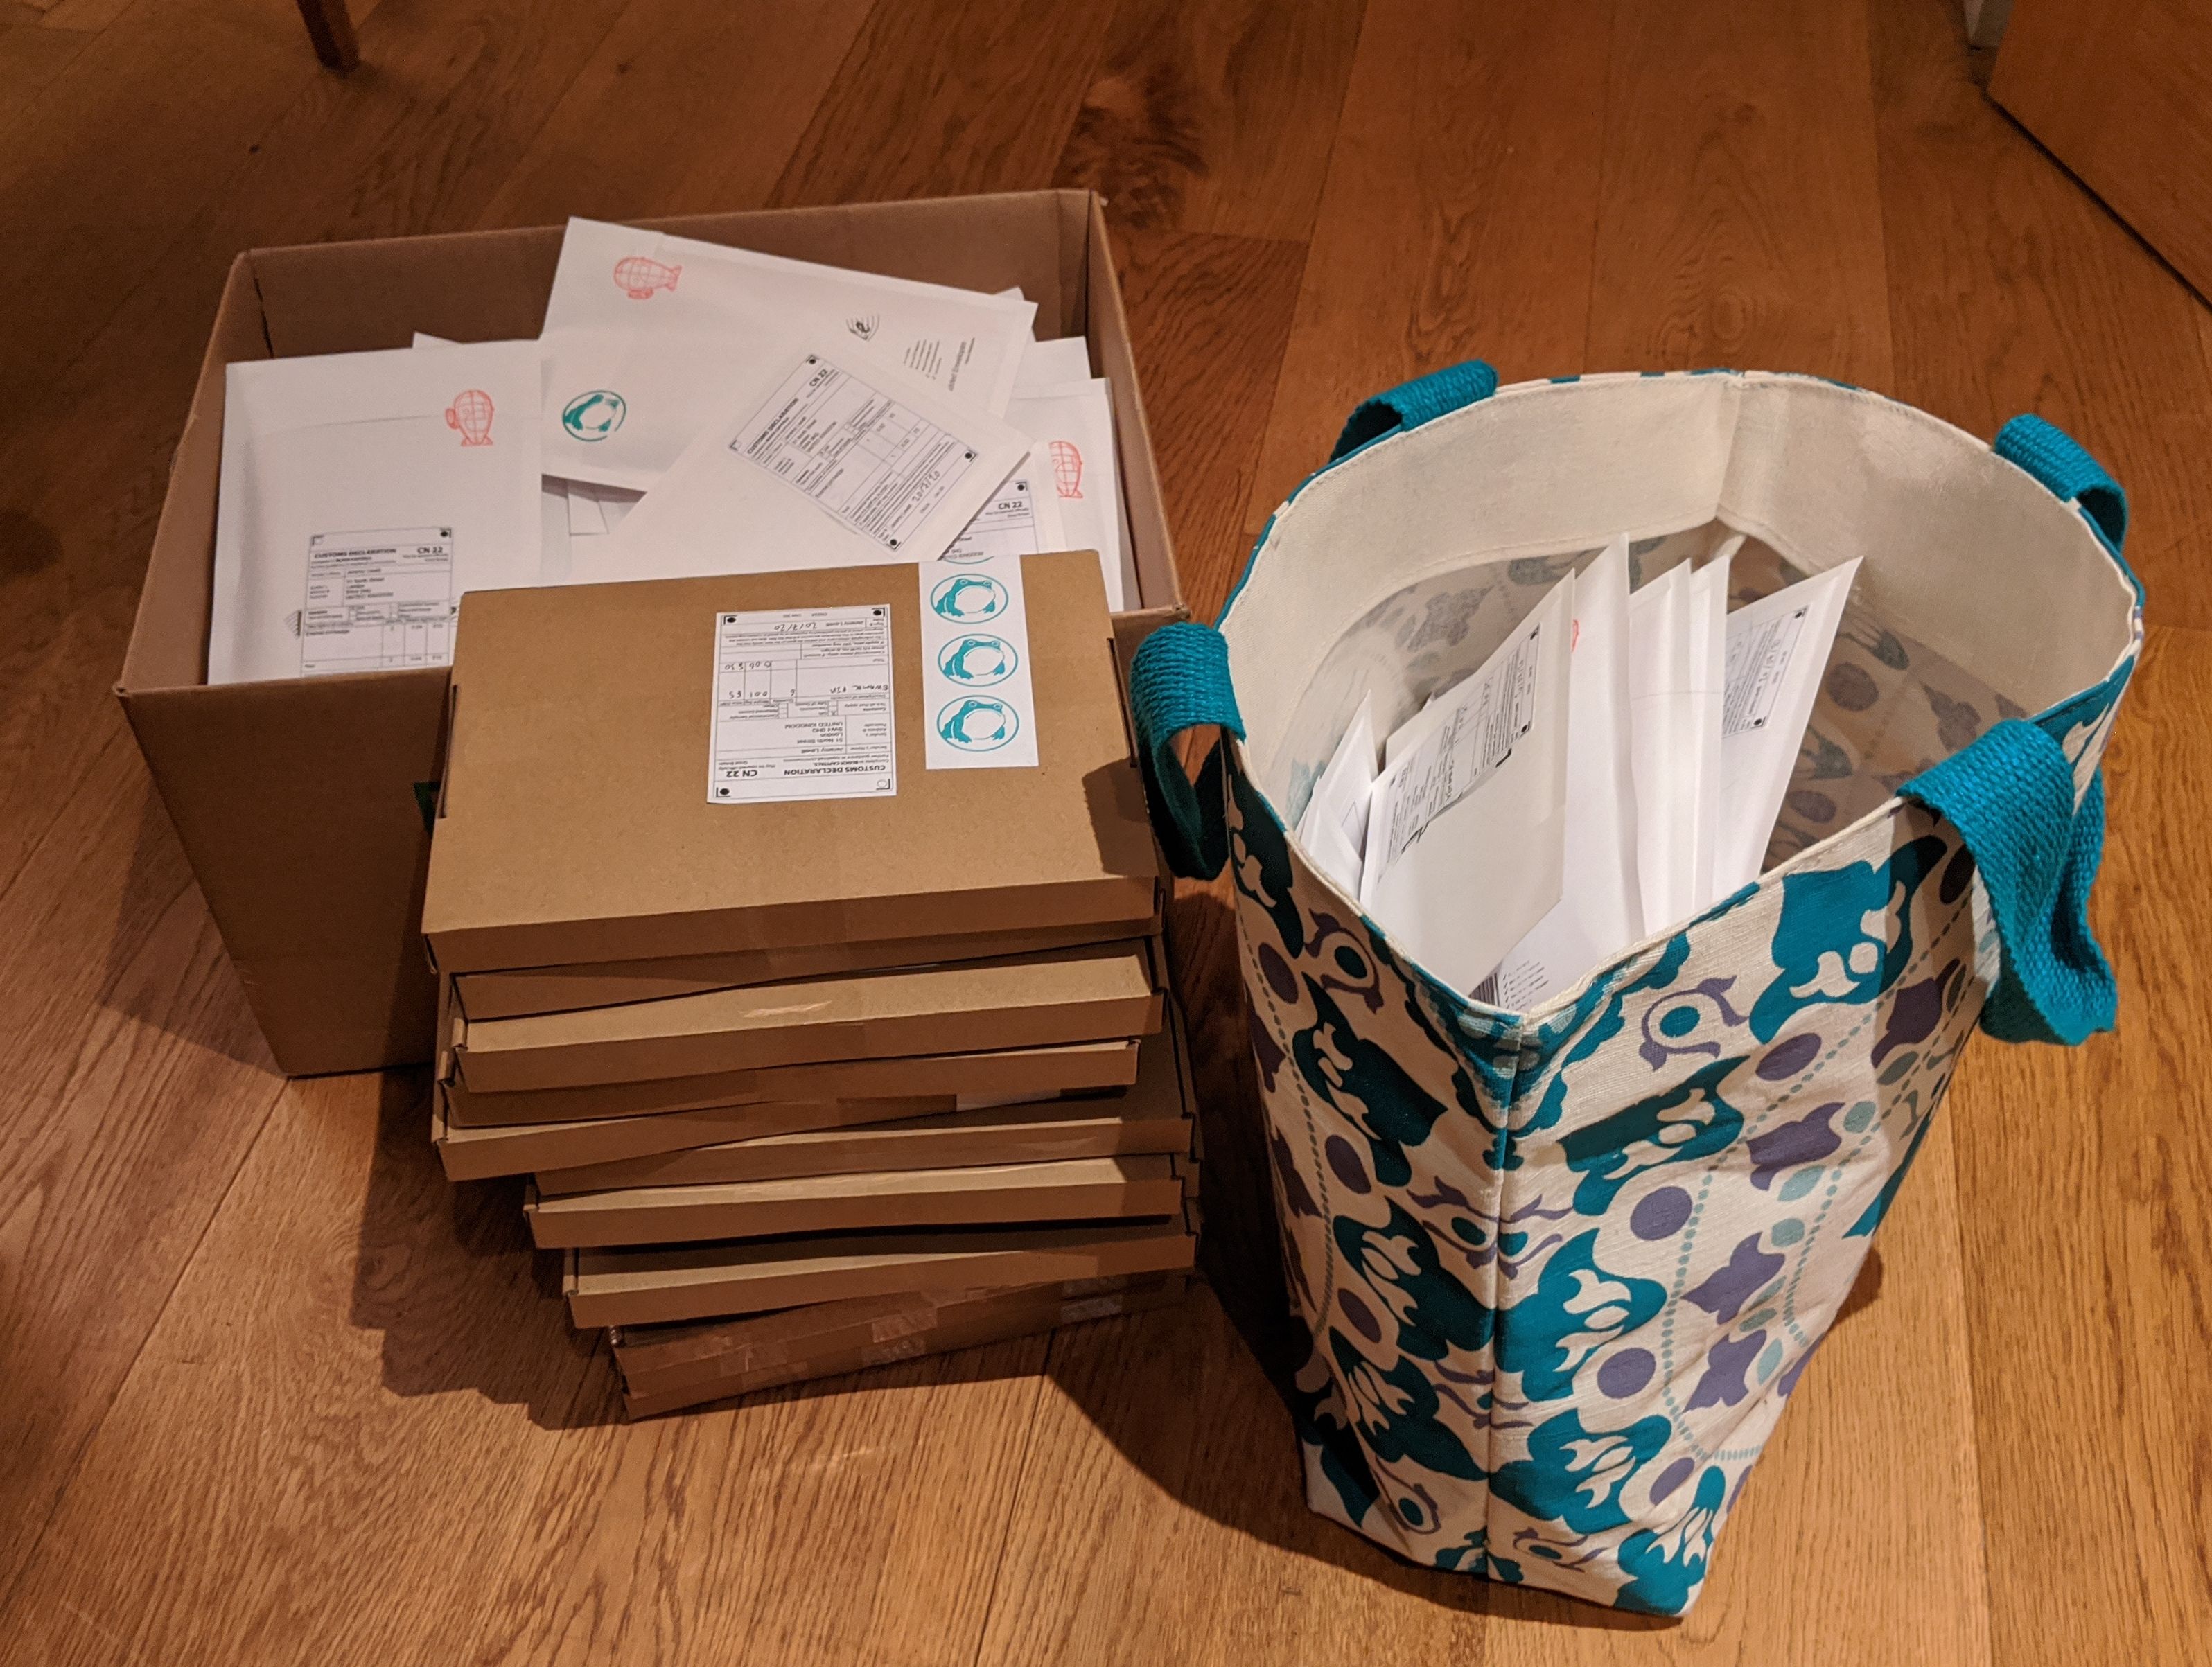
Backing cards and pre-printed customs stickers ready to go.
All my pin designs, in takeaway boxes. I believe this is called “upcycling” or something.
Between my first and second Kickstarters, I’ve moved house, and one of the best things about my new place is having a little workspace set up just for pin packaging. Join me as I put a great many little frogs in bags to send them out into the world…
Two layers of plastic.
One layer of plastic.
FREEDOM.
The pins arrive in tiny plastic bags to protect them (I’ve asked my manufacturer if they can do it in paper, but no dice.) Fortunately these can be recycled like polythene bags, so I bundle them all together and take them to my supermarket after unwrapping them.
There’s something oddly cathartic about a little slide for frogs.
A frog and his clutch are soon parted.
They’re fine! Look at them, they’re smiling. Oh, wait.
I’ve always been torn about rubber vs butterfly clutches to hold the pin in place. Rubber is easier to take off and on, but does have a habit of coming loose under sustained gentle pressure; in my experience butterfly have a threshold below which they’ll stay on quite safely (and then pop off), but poorly made butterfly clutches have a habit of not holding at all or spiking the wearer. However, the experience of posting hundreds of butterfly clutches was very hard on my fingers, so this time I tried rubber. I got myself a declutching device (there are loads on Etsy – mine is from Galloway Labs, who also do a backing card press which I’ve found very useful) which hugely simplified the process of getting the frogs off their clutches.
Backing cards fresh from the printer.
Stay on target… stay on target…
“Build me an army worthy of the garden pond.”
Rob Turpin, who designs my pins, gives little targets to stick the pin post through.
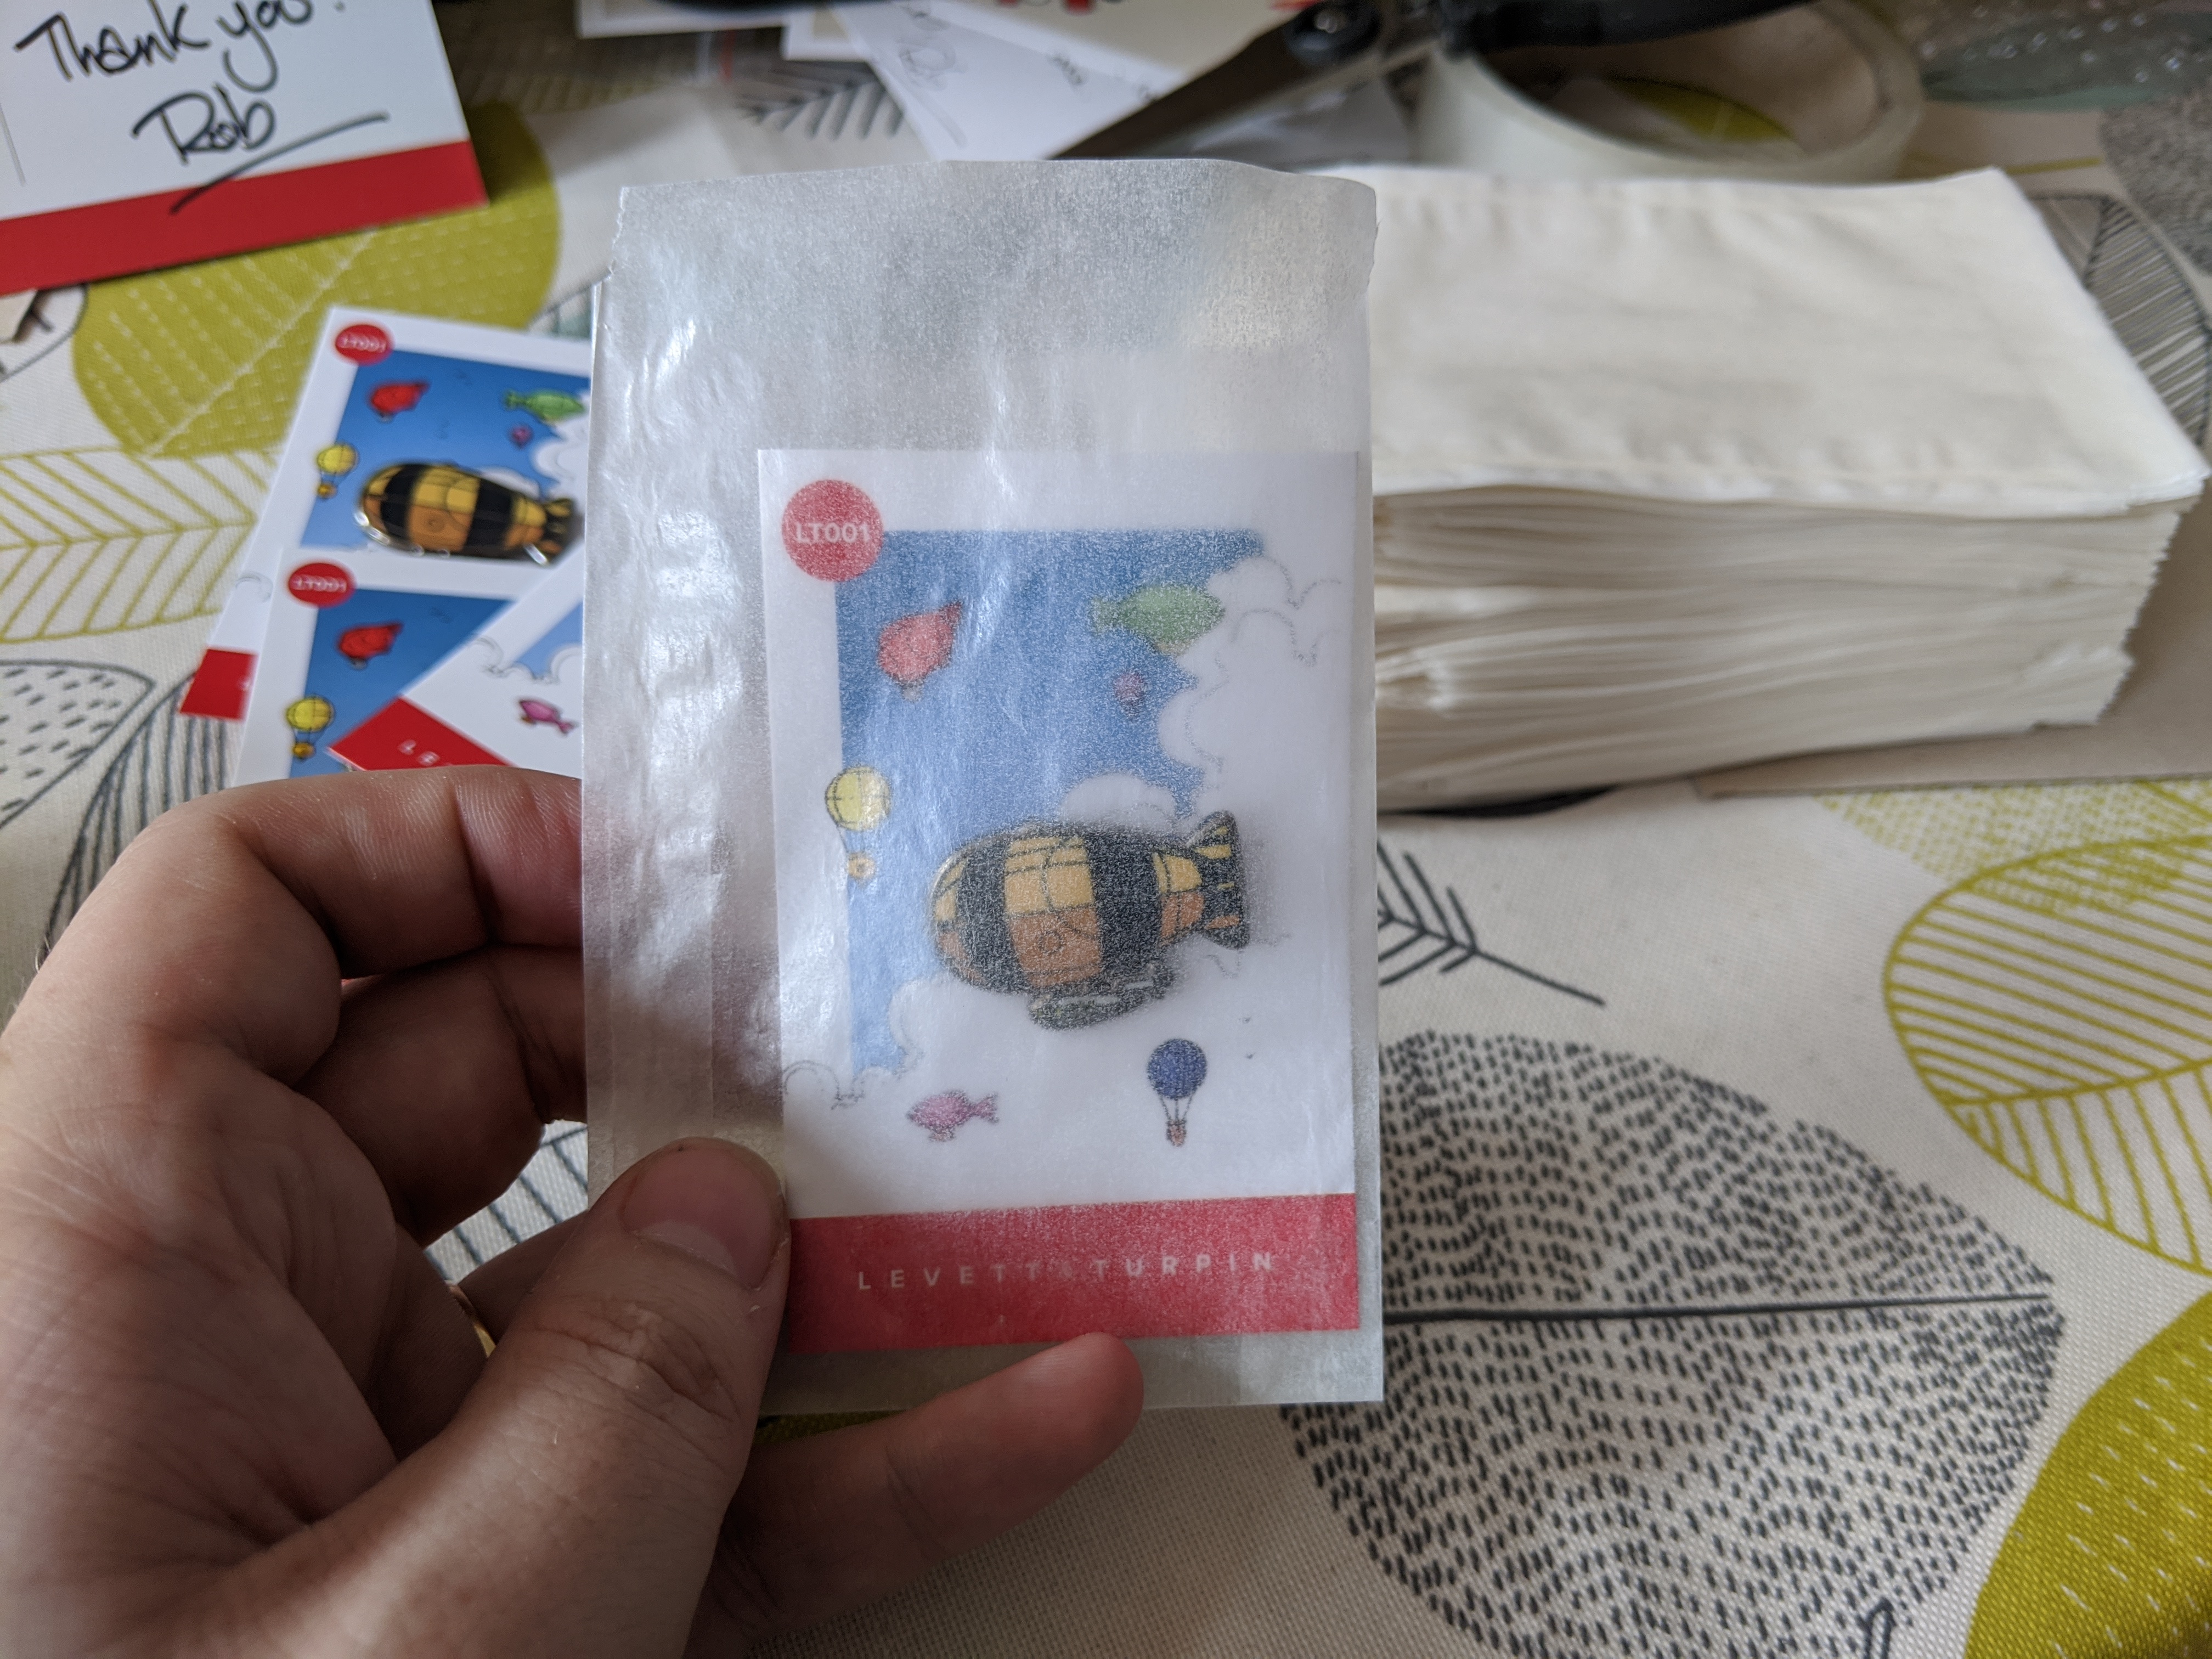
Glassine bag before covering.
All nice and cosy.
Every part of my packaging is biodegradable, so there’s that.
Once on their backing cards, I put them in glassine bags (glassine being a sort of smooth paper, for those unfamiliar – unlike waxed paper, it biodegrades nice and easily.) You can buy these in bulk (I bought a thousand at a cost of about 4.5p each, which isn’t nothing but isn’t much). This adds a little extra step. Finally, they go in jiffy-bags – I’m still using up the last of my conventional bubble mailers, but once they’re done everything I post will be in an (also-biodegradable) Enviroflute corrugated paper bag.
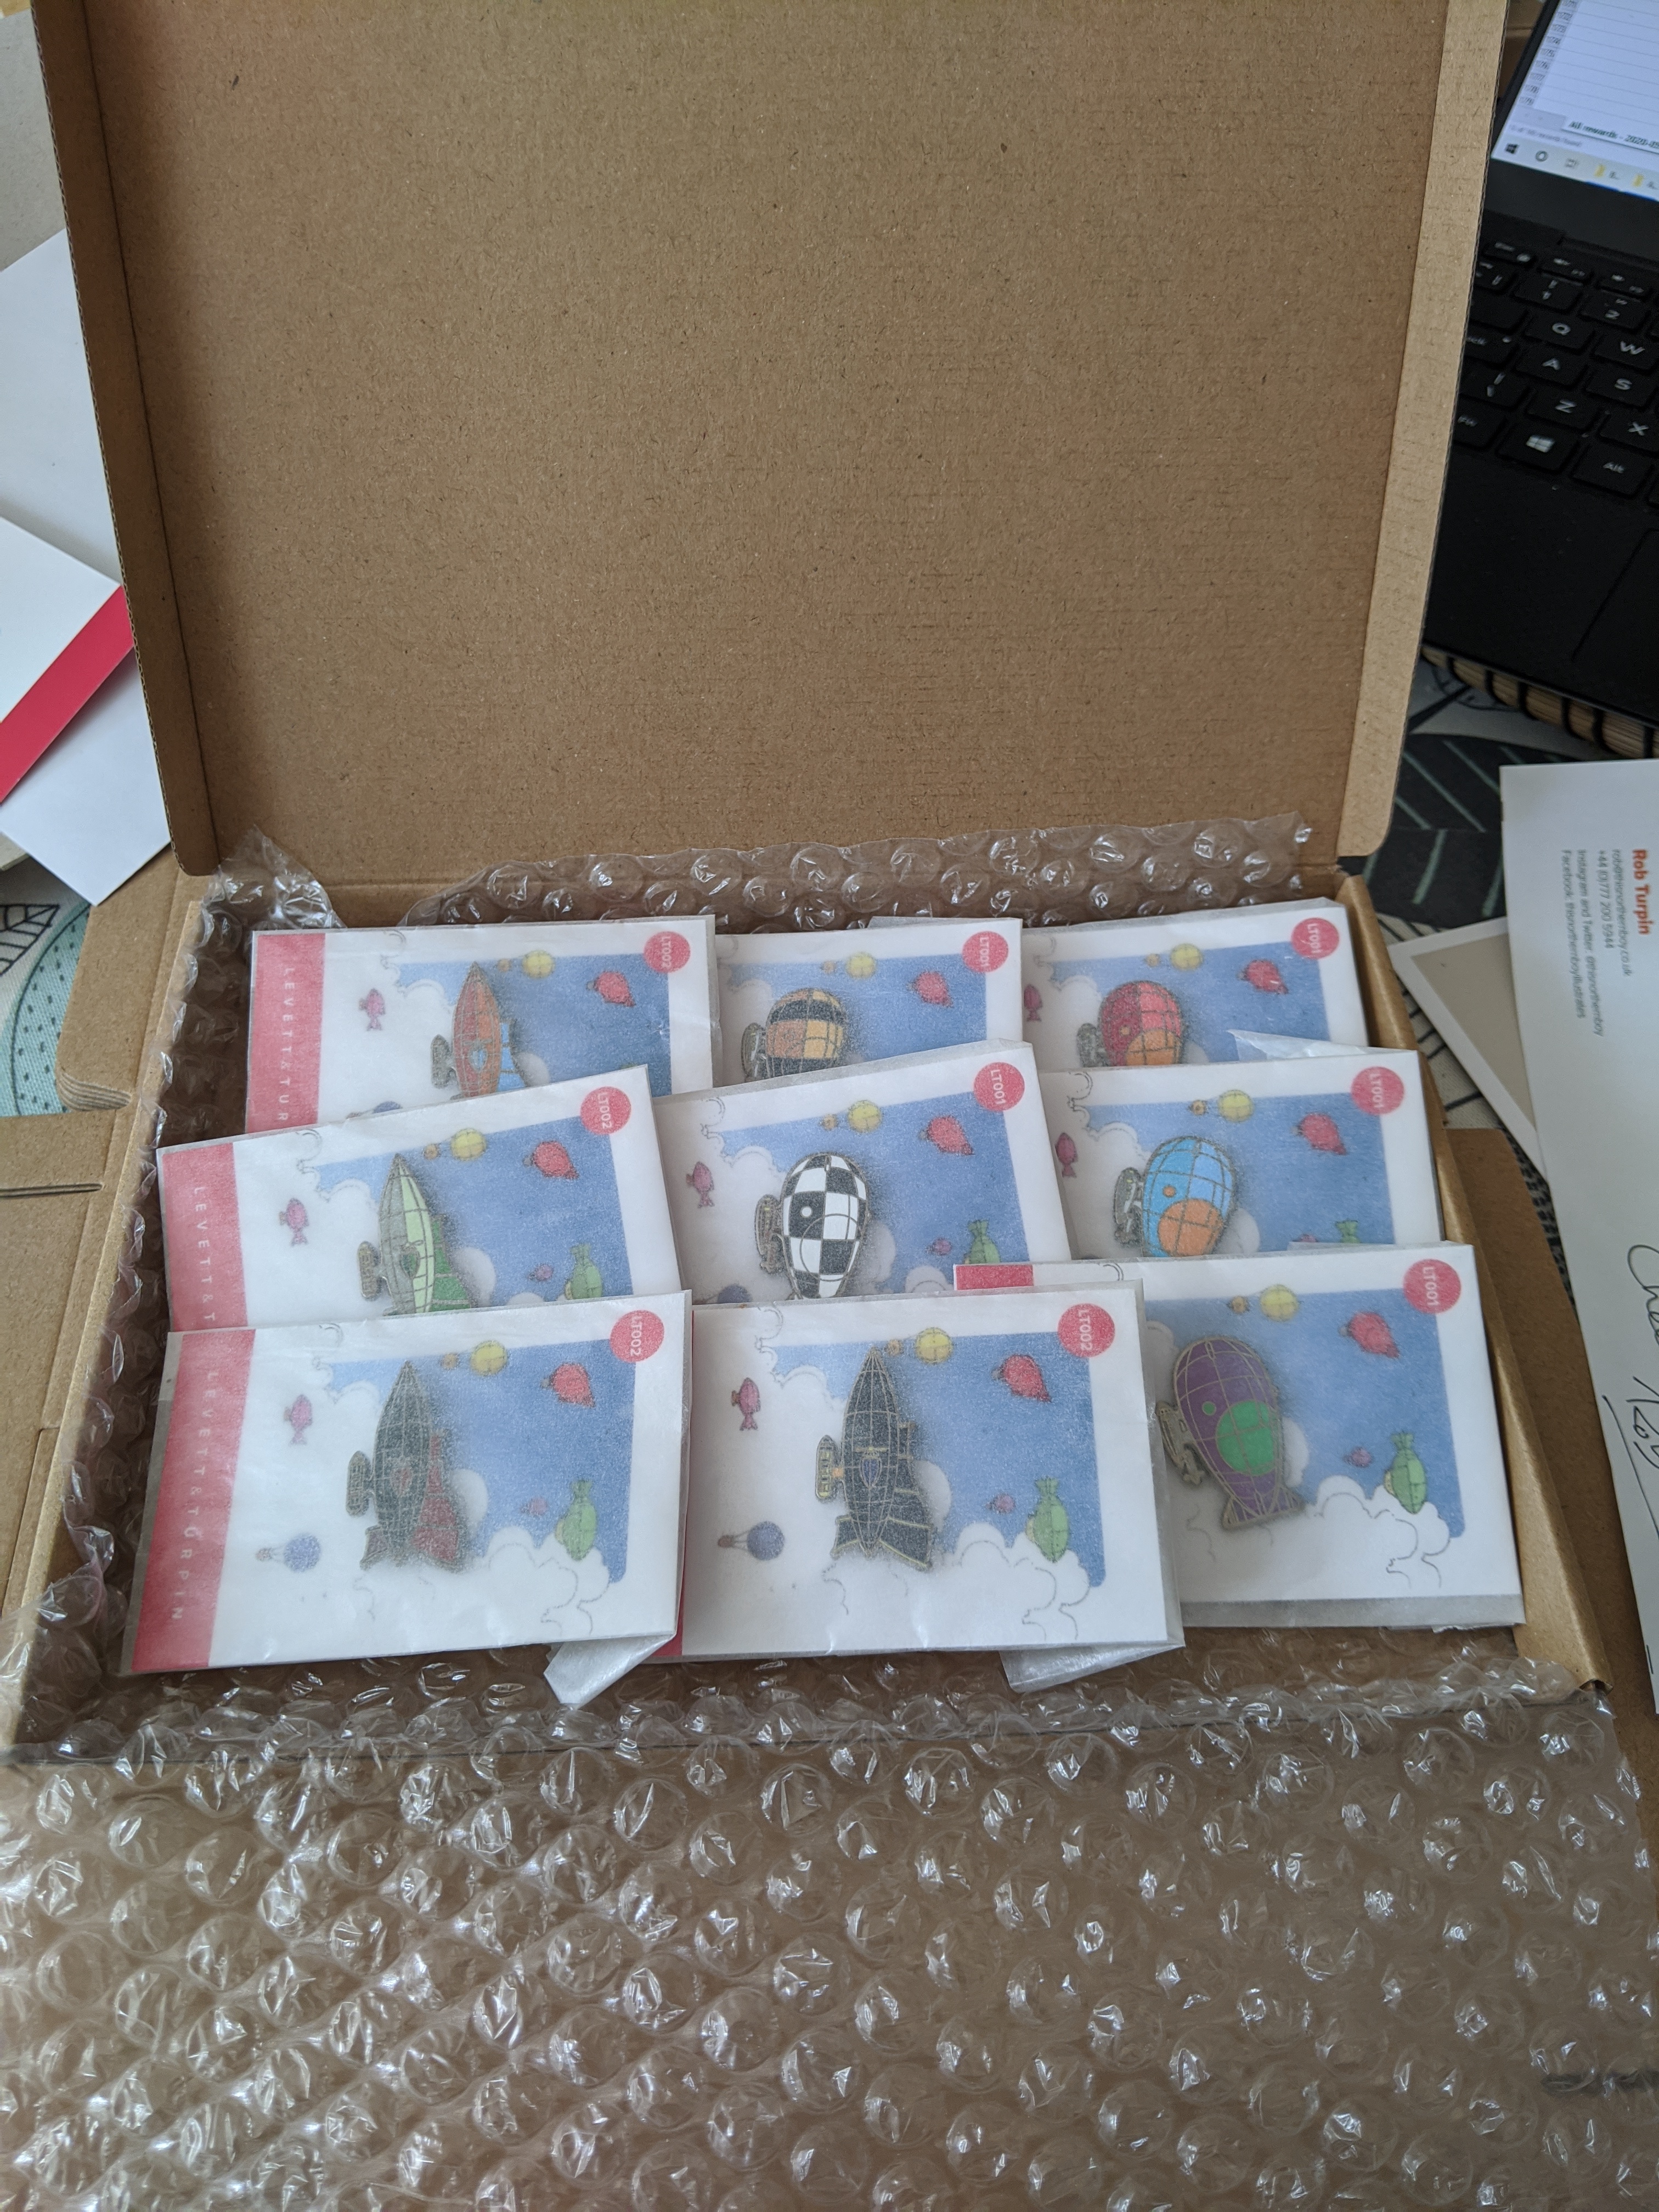
Larger packages go in folding cardboard boxes with bubble wrap or tissue paper, as you can see in this here fine unboxin’ video.
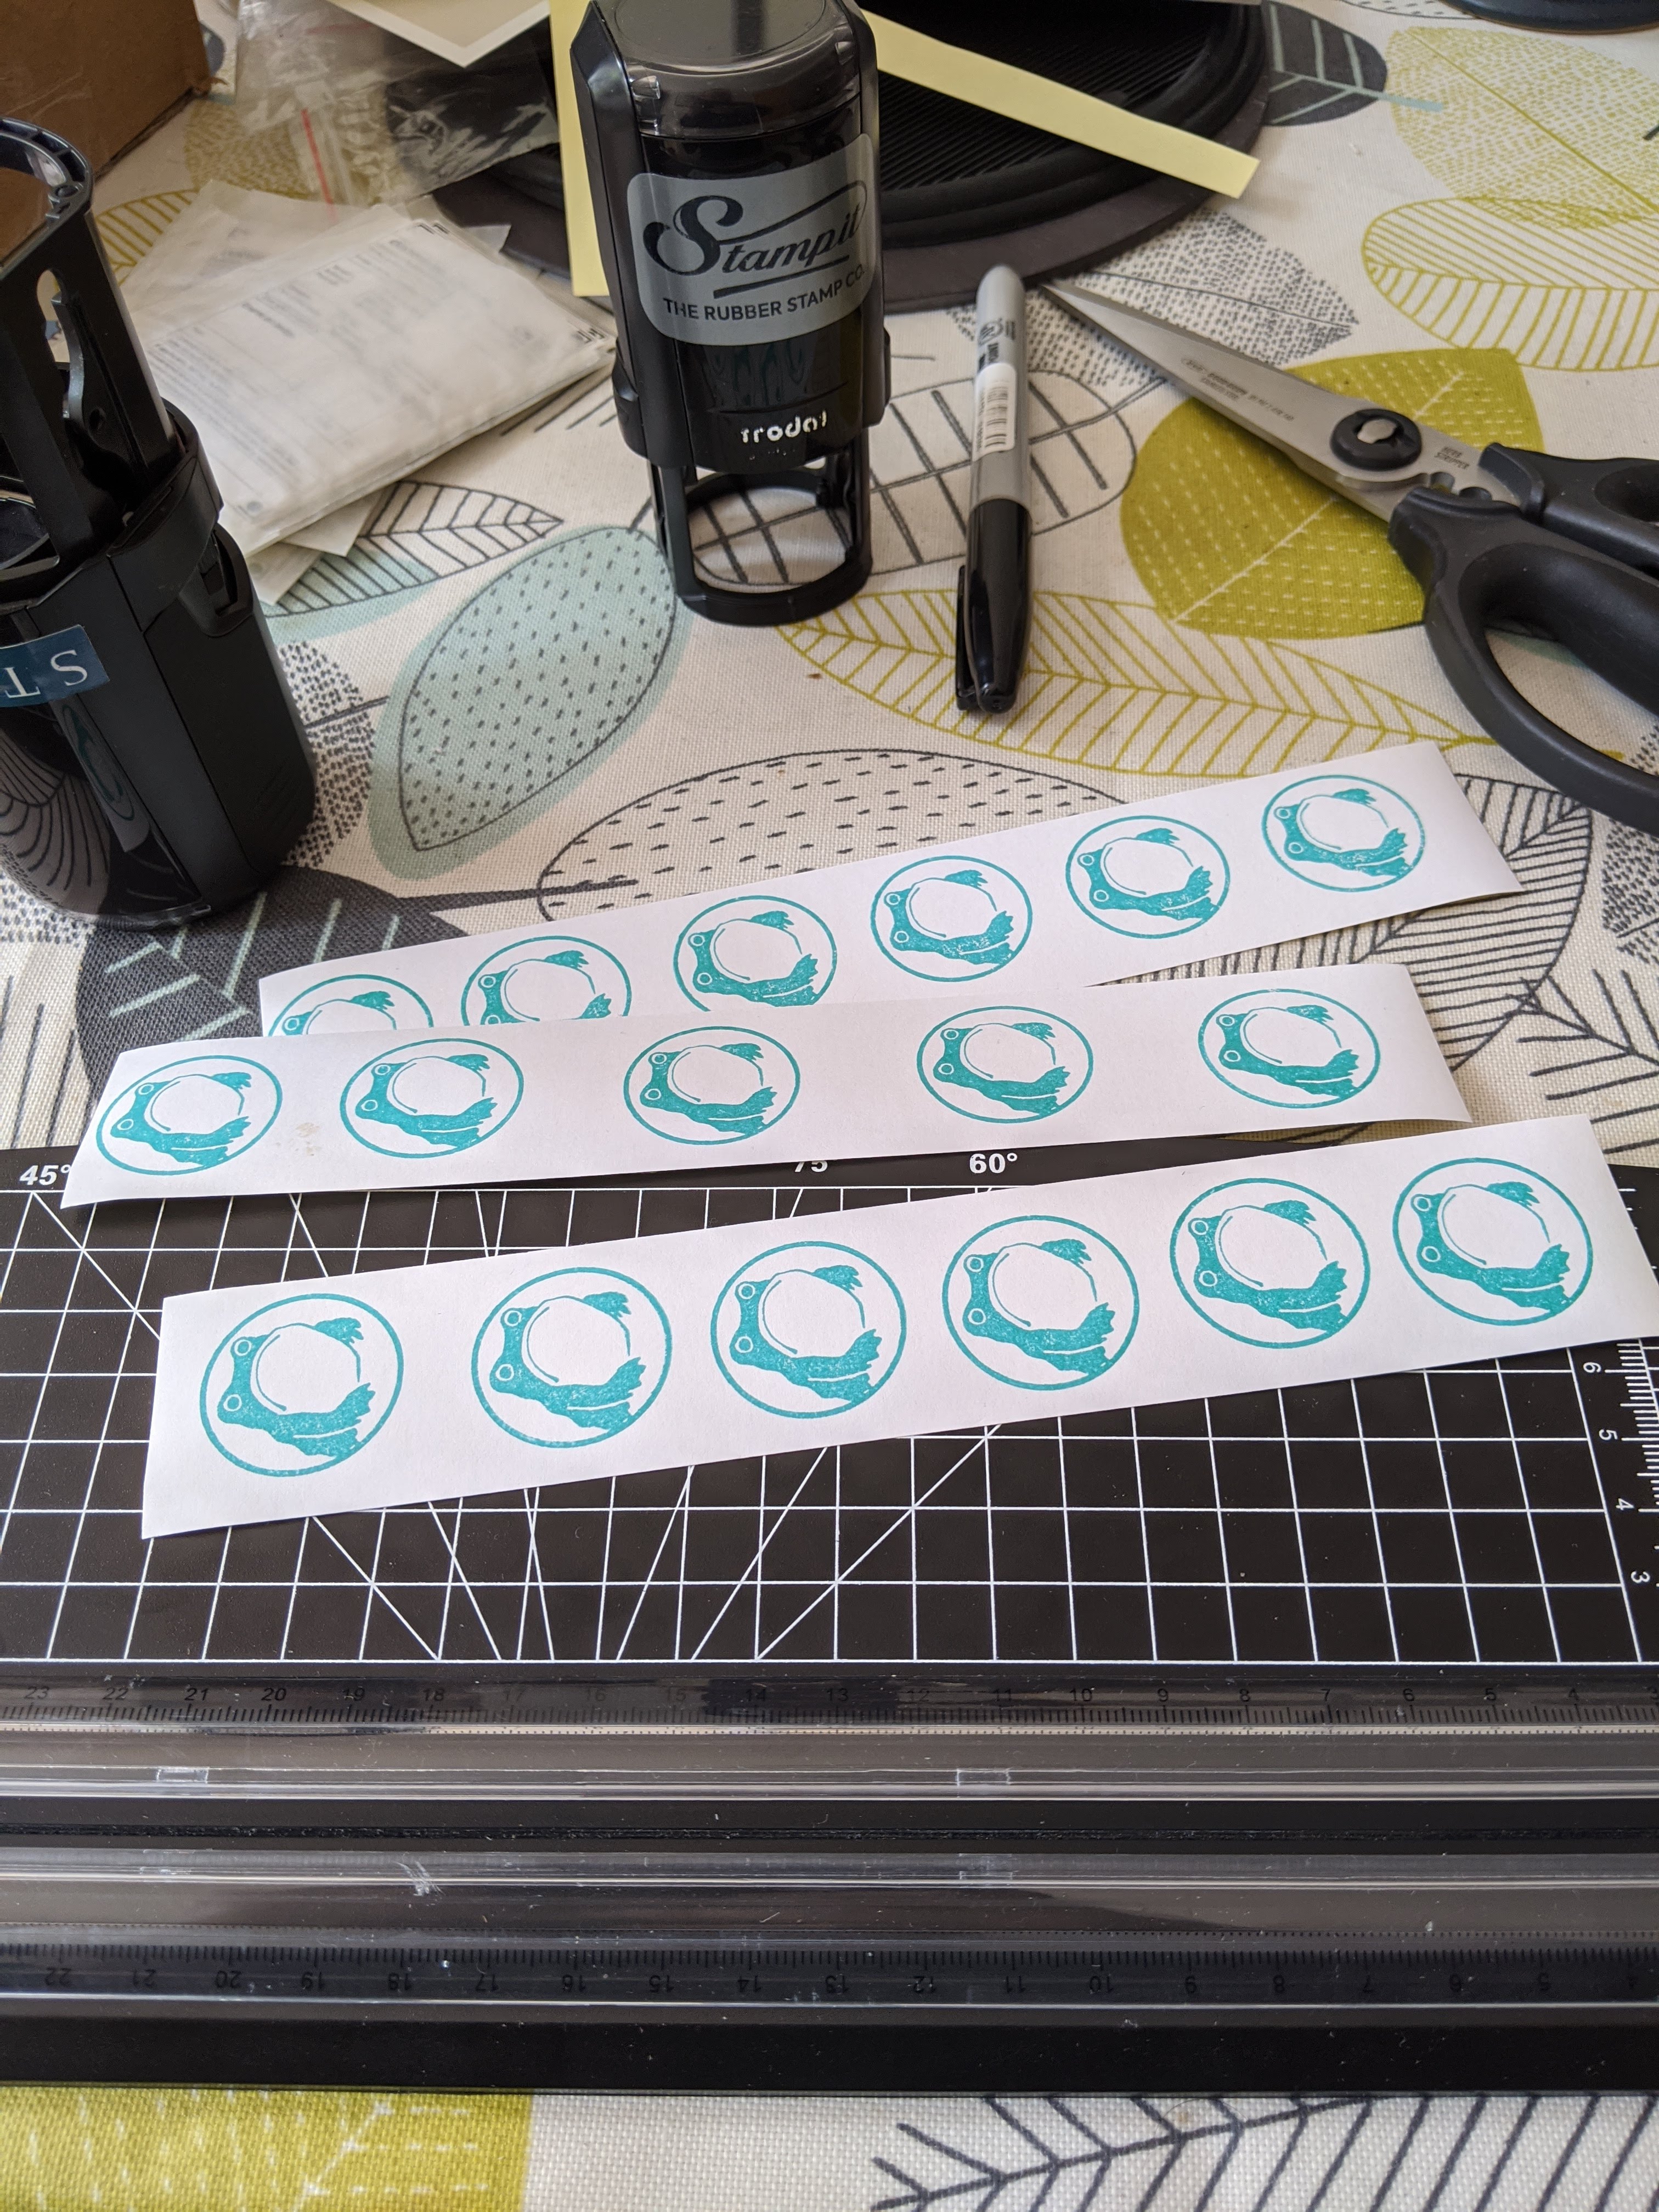
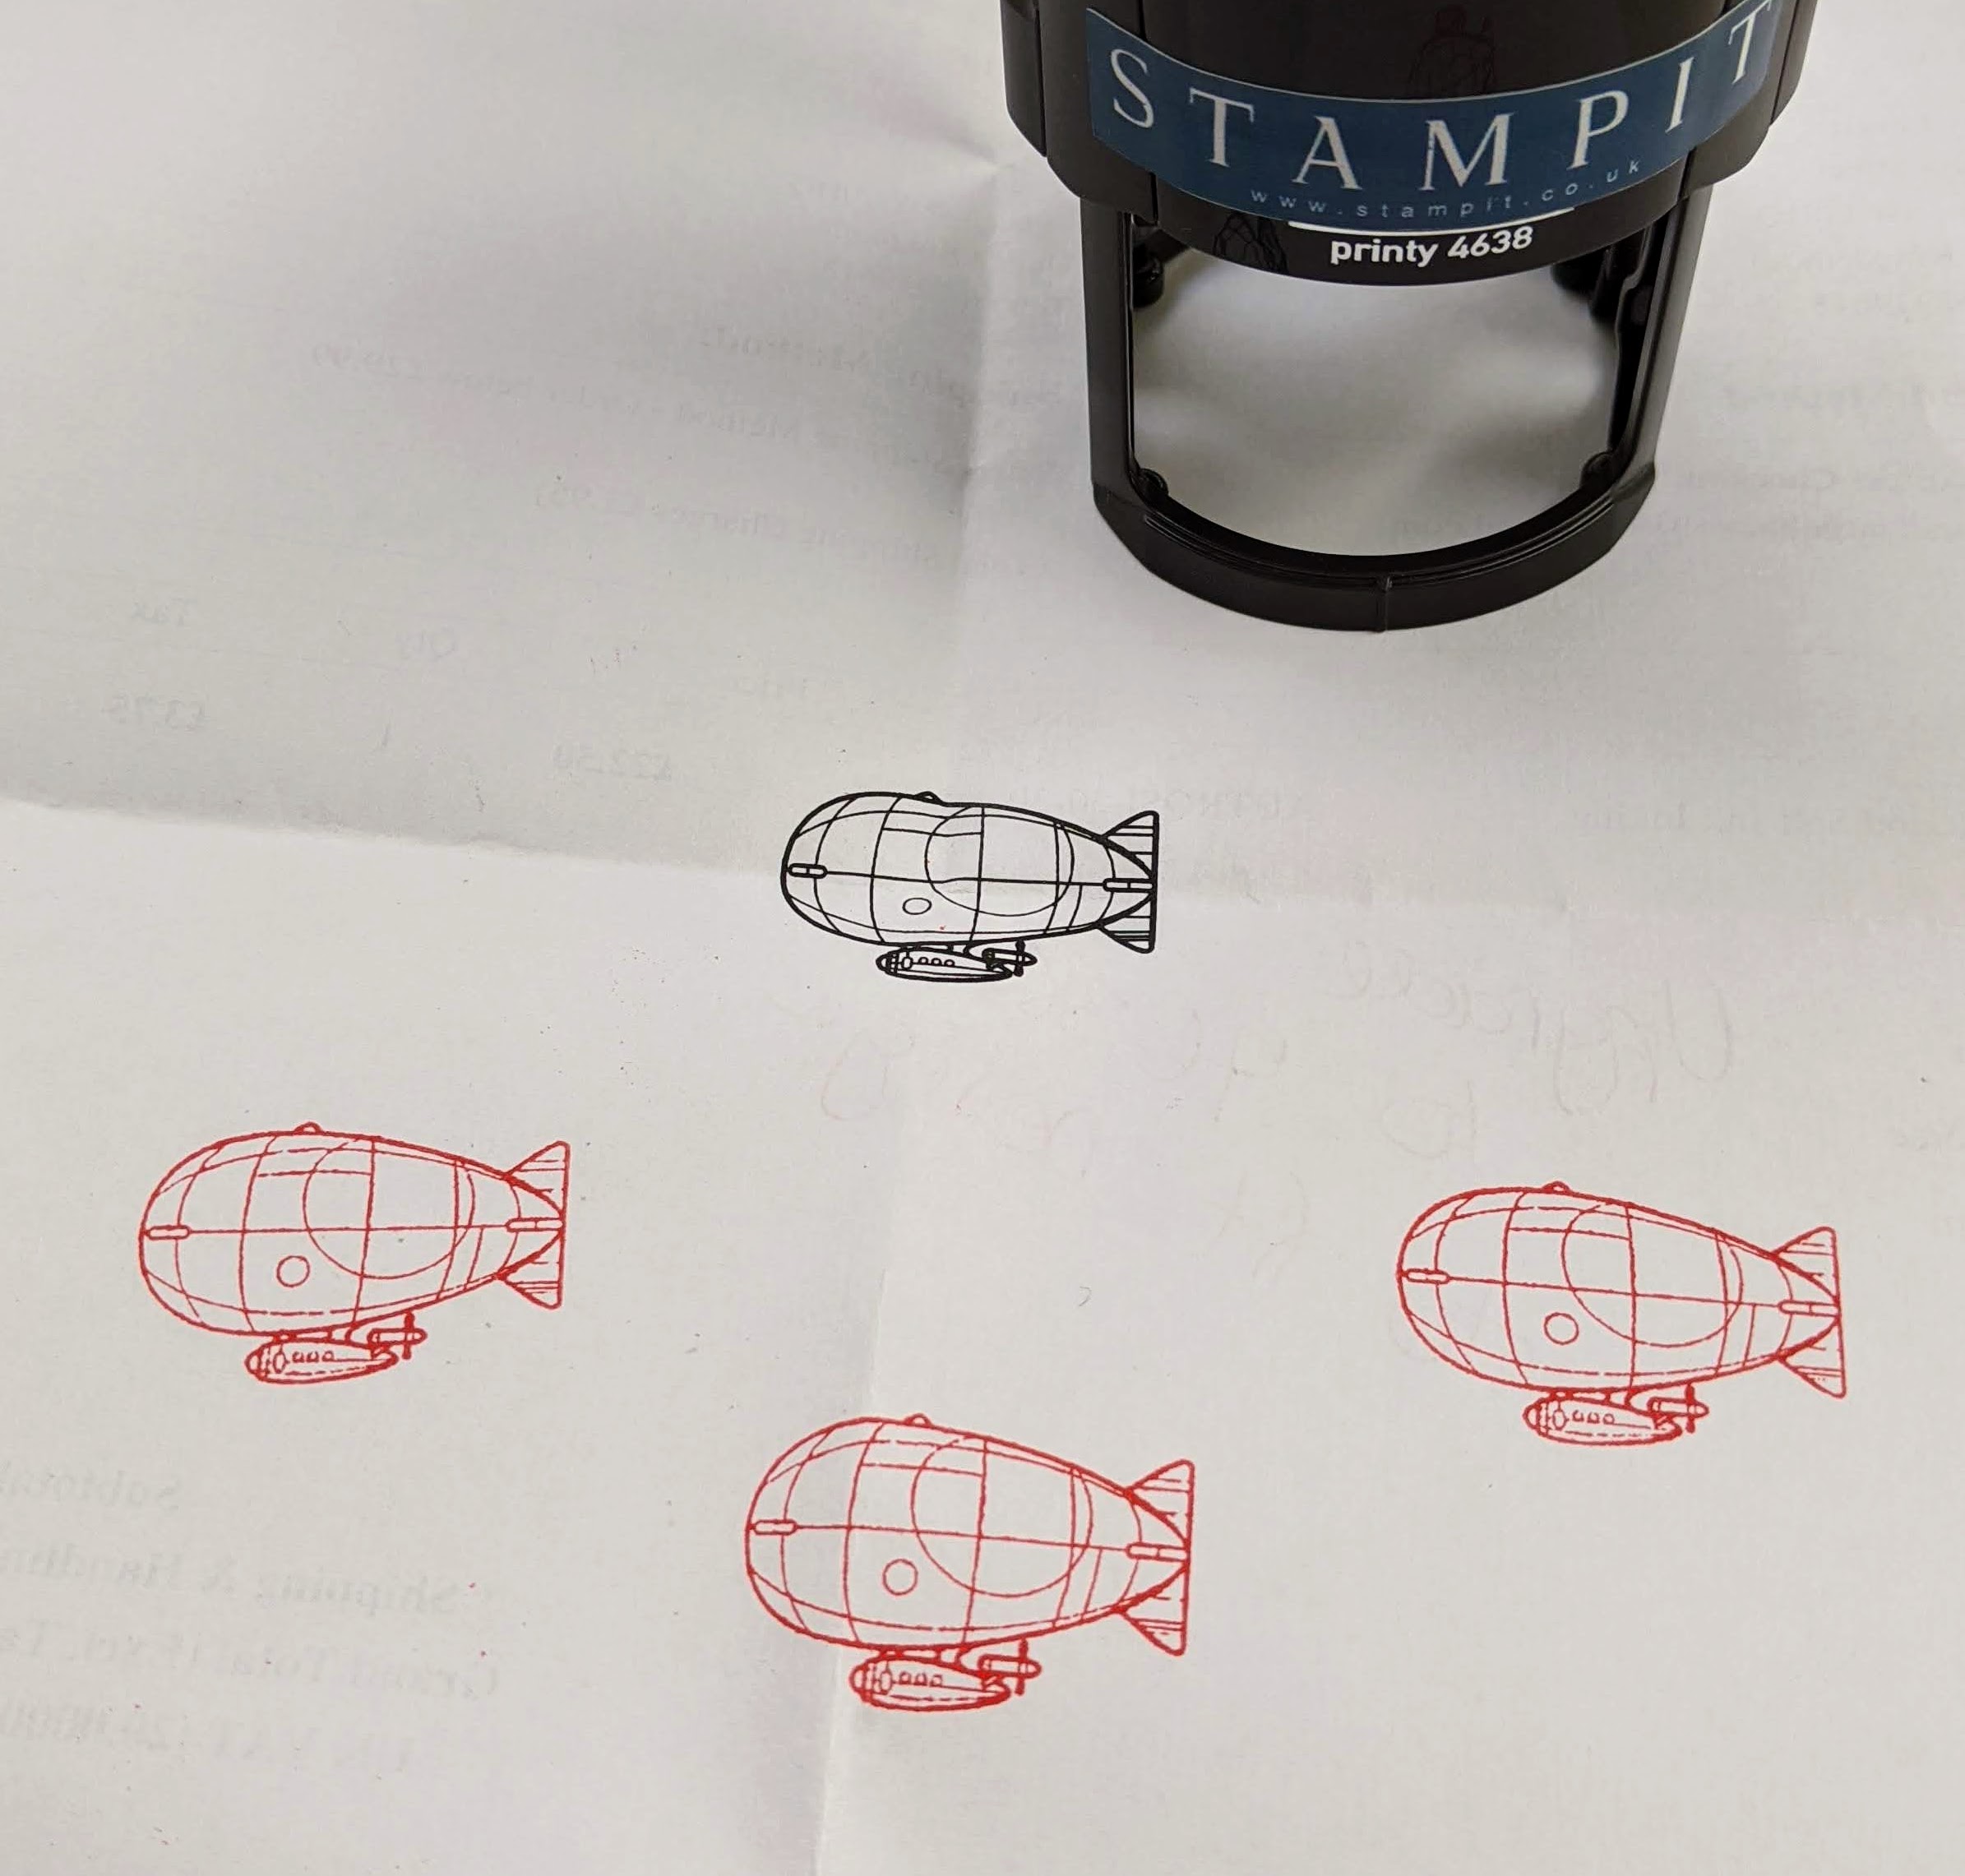
Finally, postage: I use Royal Mail click & drop to get postage labels, print four to an A4 sheet on stickyback paper, and guillotine them up. (No pics, cos people’s addresses.) For international – and now for EU – they also get CN22 customs labels, which I print in bulk. Finally, every envelope gets stamped with my little gloomy frog rubber stamp, because I don’t have much of a brand but I’m going to make it everyone’s problem.
I use offcuts of stickyback paper to make FROG TAPE, with which I seal the larger packages.
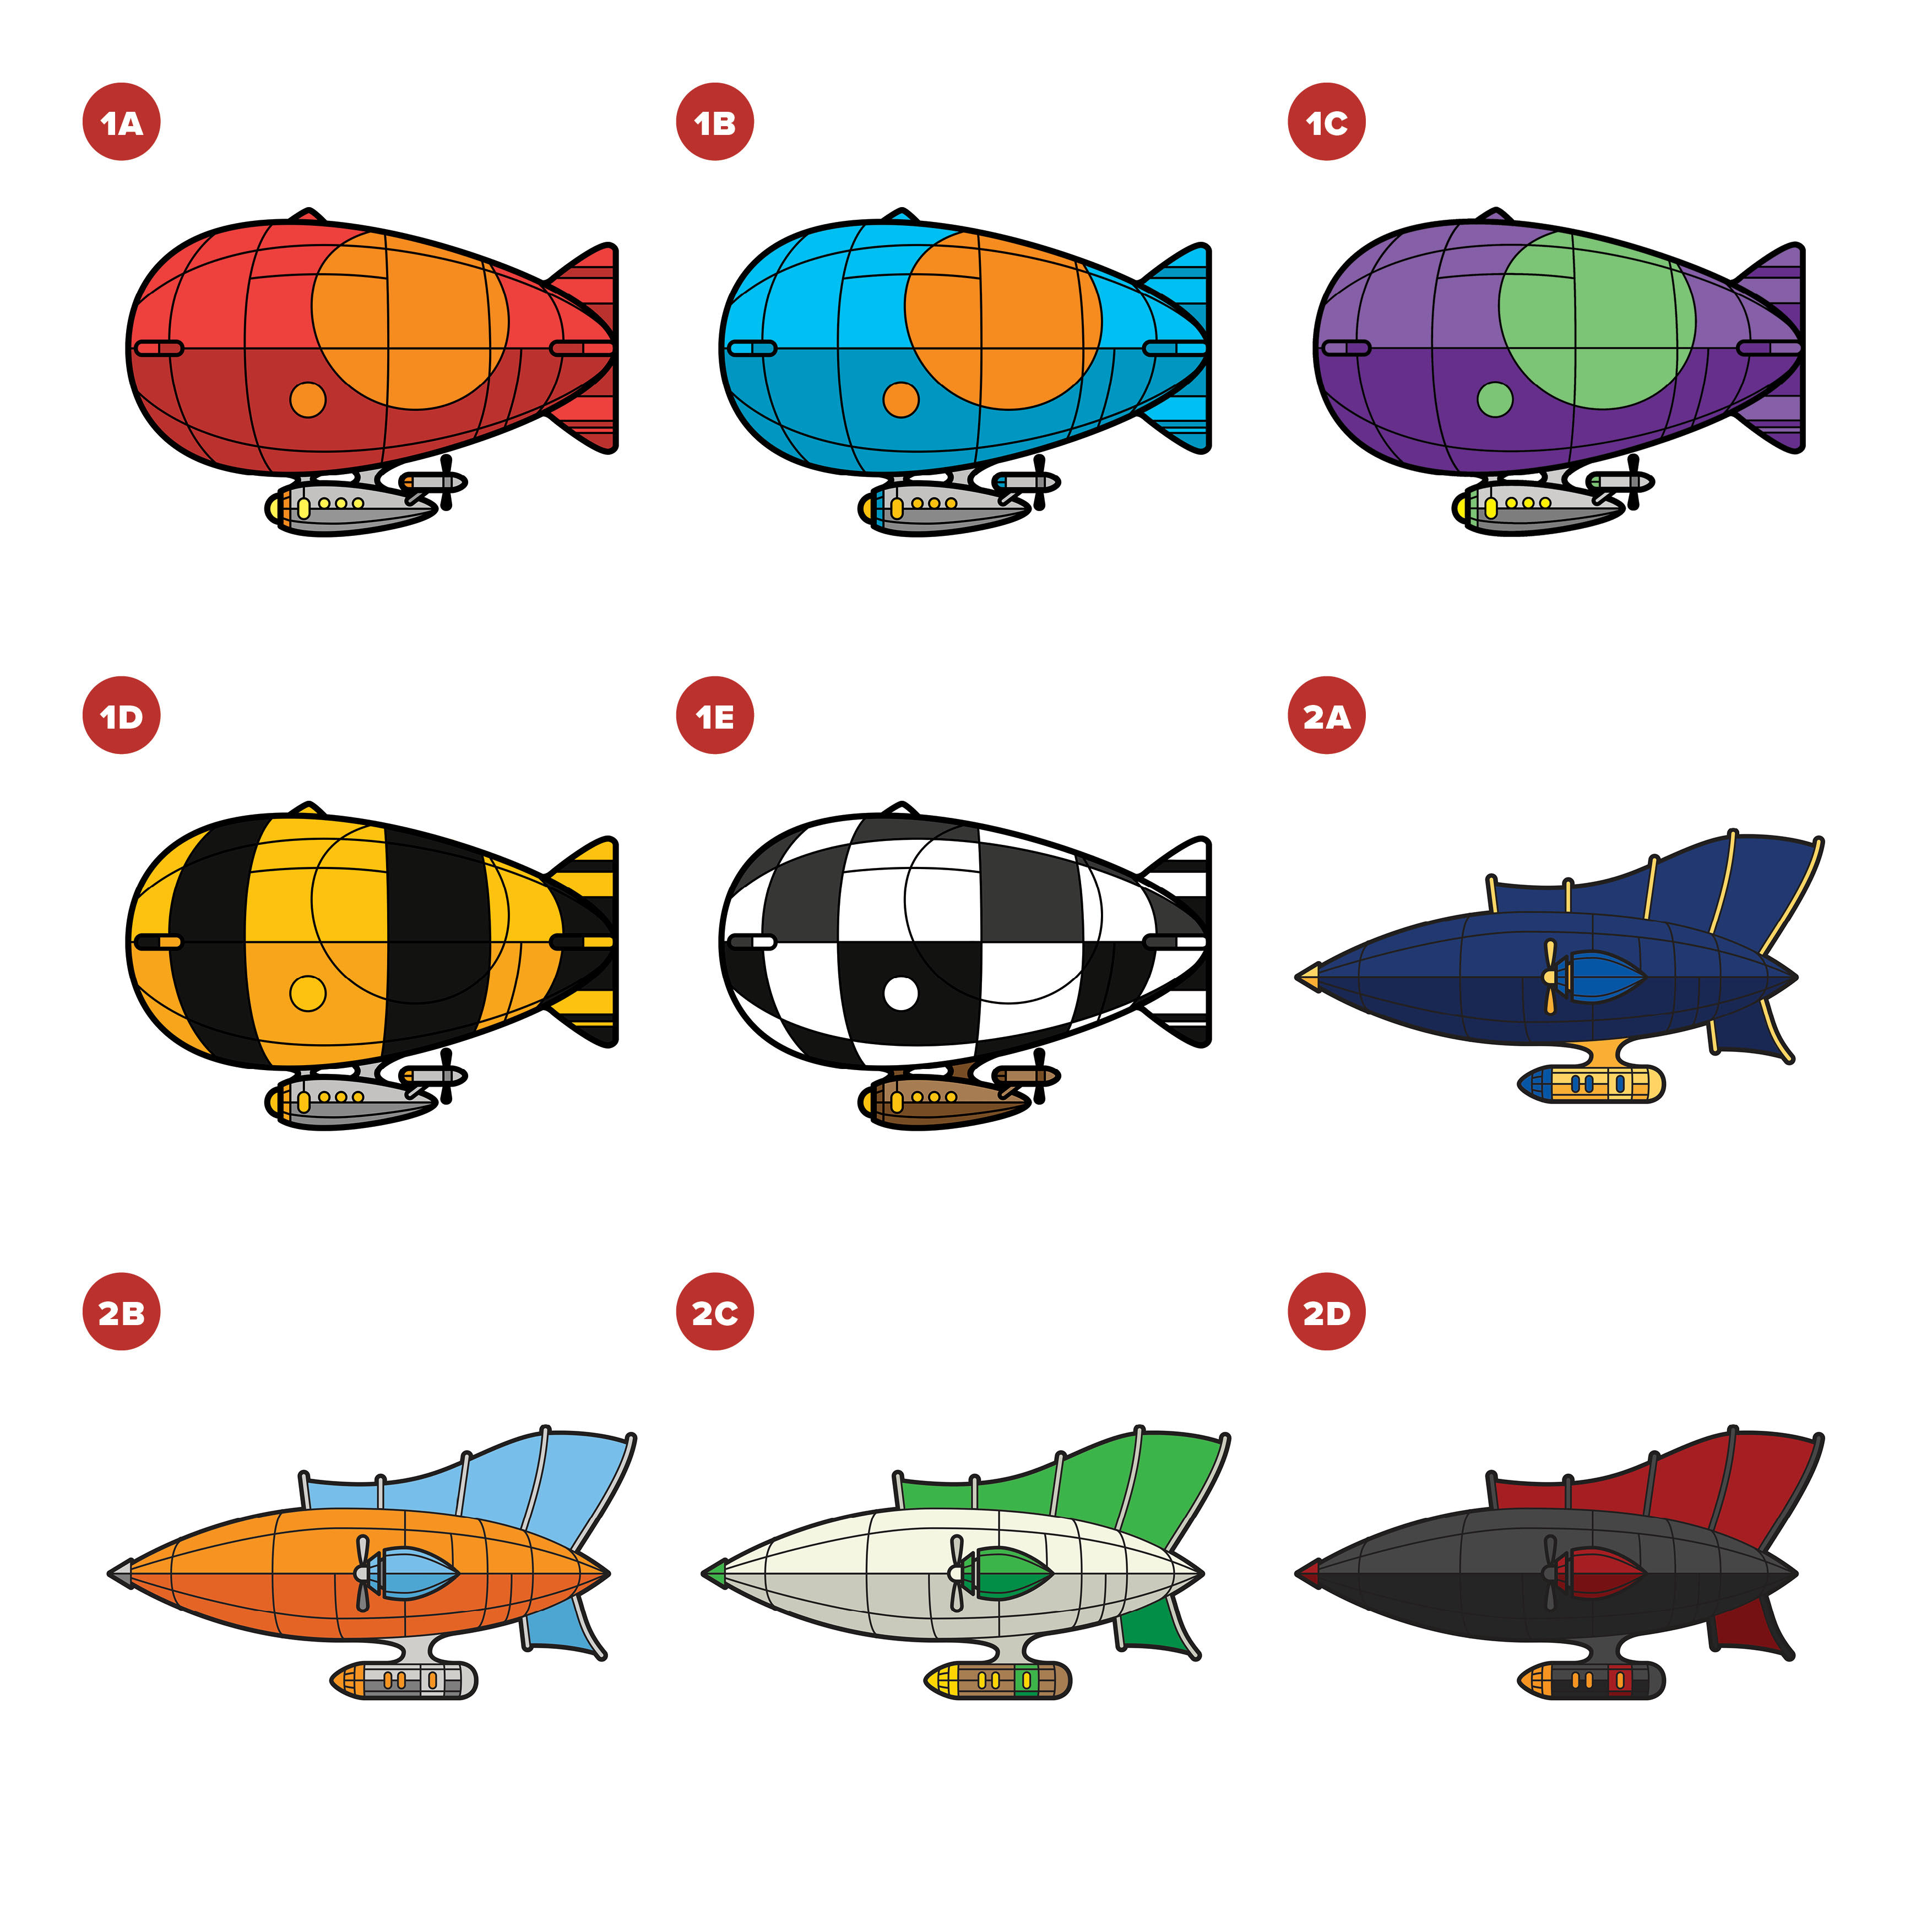
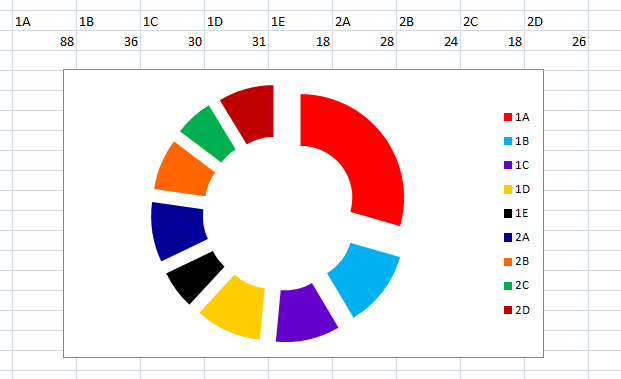
At the end of the Kickstarter, I sent out a survey to all backers to get their addresses and pin preferences, selecting from the grid above. I was quite worried that the wide variety of designs would cause my backers confusion. As it turned out this was no problem at all and everyone followed the instructions. A couple of people selected one too many pins; upon messaging they either changed it or were happy to pay a bit more.
However, for my own internal management purposes the tier structure I’d come up with was a nightmare. The way KS provides you with the data from your backer polls is broken up by tier, so the resulting spreadsheet the survey produced was very awkard to manage.
So next time I will: Poll buyers exactly the same way but design tiers to cause myself fewer spreadsheet migraines.
Lesson 8: Packaging
For my first foray into pin-selling I’d just stuck the frog through a card and put him in the smallest (110x165mm) jiffy-bag (bubble mailer to Americans) I could get my hands on. Most customers were happy with this but the only less-than-perfect reviews I got for my shop suggested that the clutch had been damaged in the post. Also, for early bird (and certain special customers) I was sending postcards, which could just about be jammed in but it wasn’t much fun for anyone. I ordered some larger (120x215mm) jiffy-bags, and some rigid cardboard boxes for the larger orders that were coming in, but that left the damage issue (worse, as I didn’t want anything in these bigger boxes scratched!)
The solution was to wrap each individual pin in its backing card in a glassine paper bag. The glassine bags are pretty cheap (about 4.5p each, as I bought them) and I feel much happier about the level of protection they offer.
Box for one of the larger orders.
So next time I will: Make sure I have the appropriate packaging to hand to begin with – which won’t be hard as I have a load of surplus now! The jiffy-bags I’m using are “Enviroflute” which are all-paper and wholly recyclable and biodegradable, meaning apart from the tape and bubble wrap on the big boxes there’s no plastic involved at all.
Lesson 9: Pin Clutches & Backing Cards
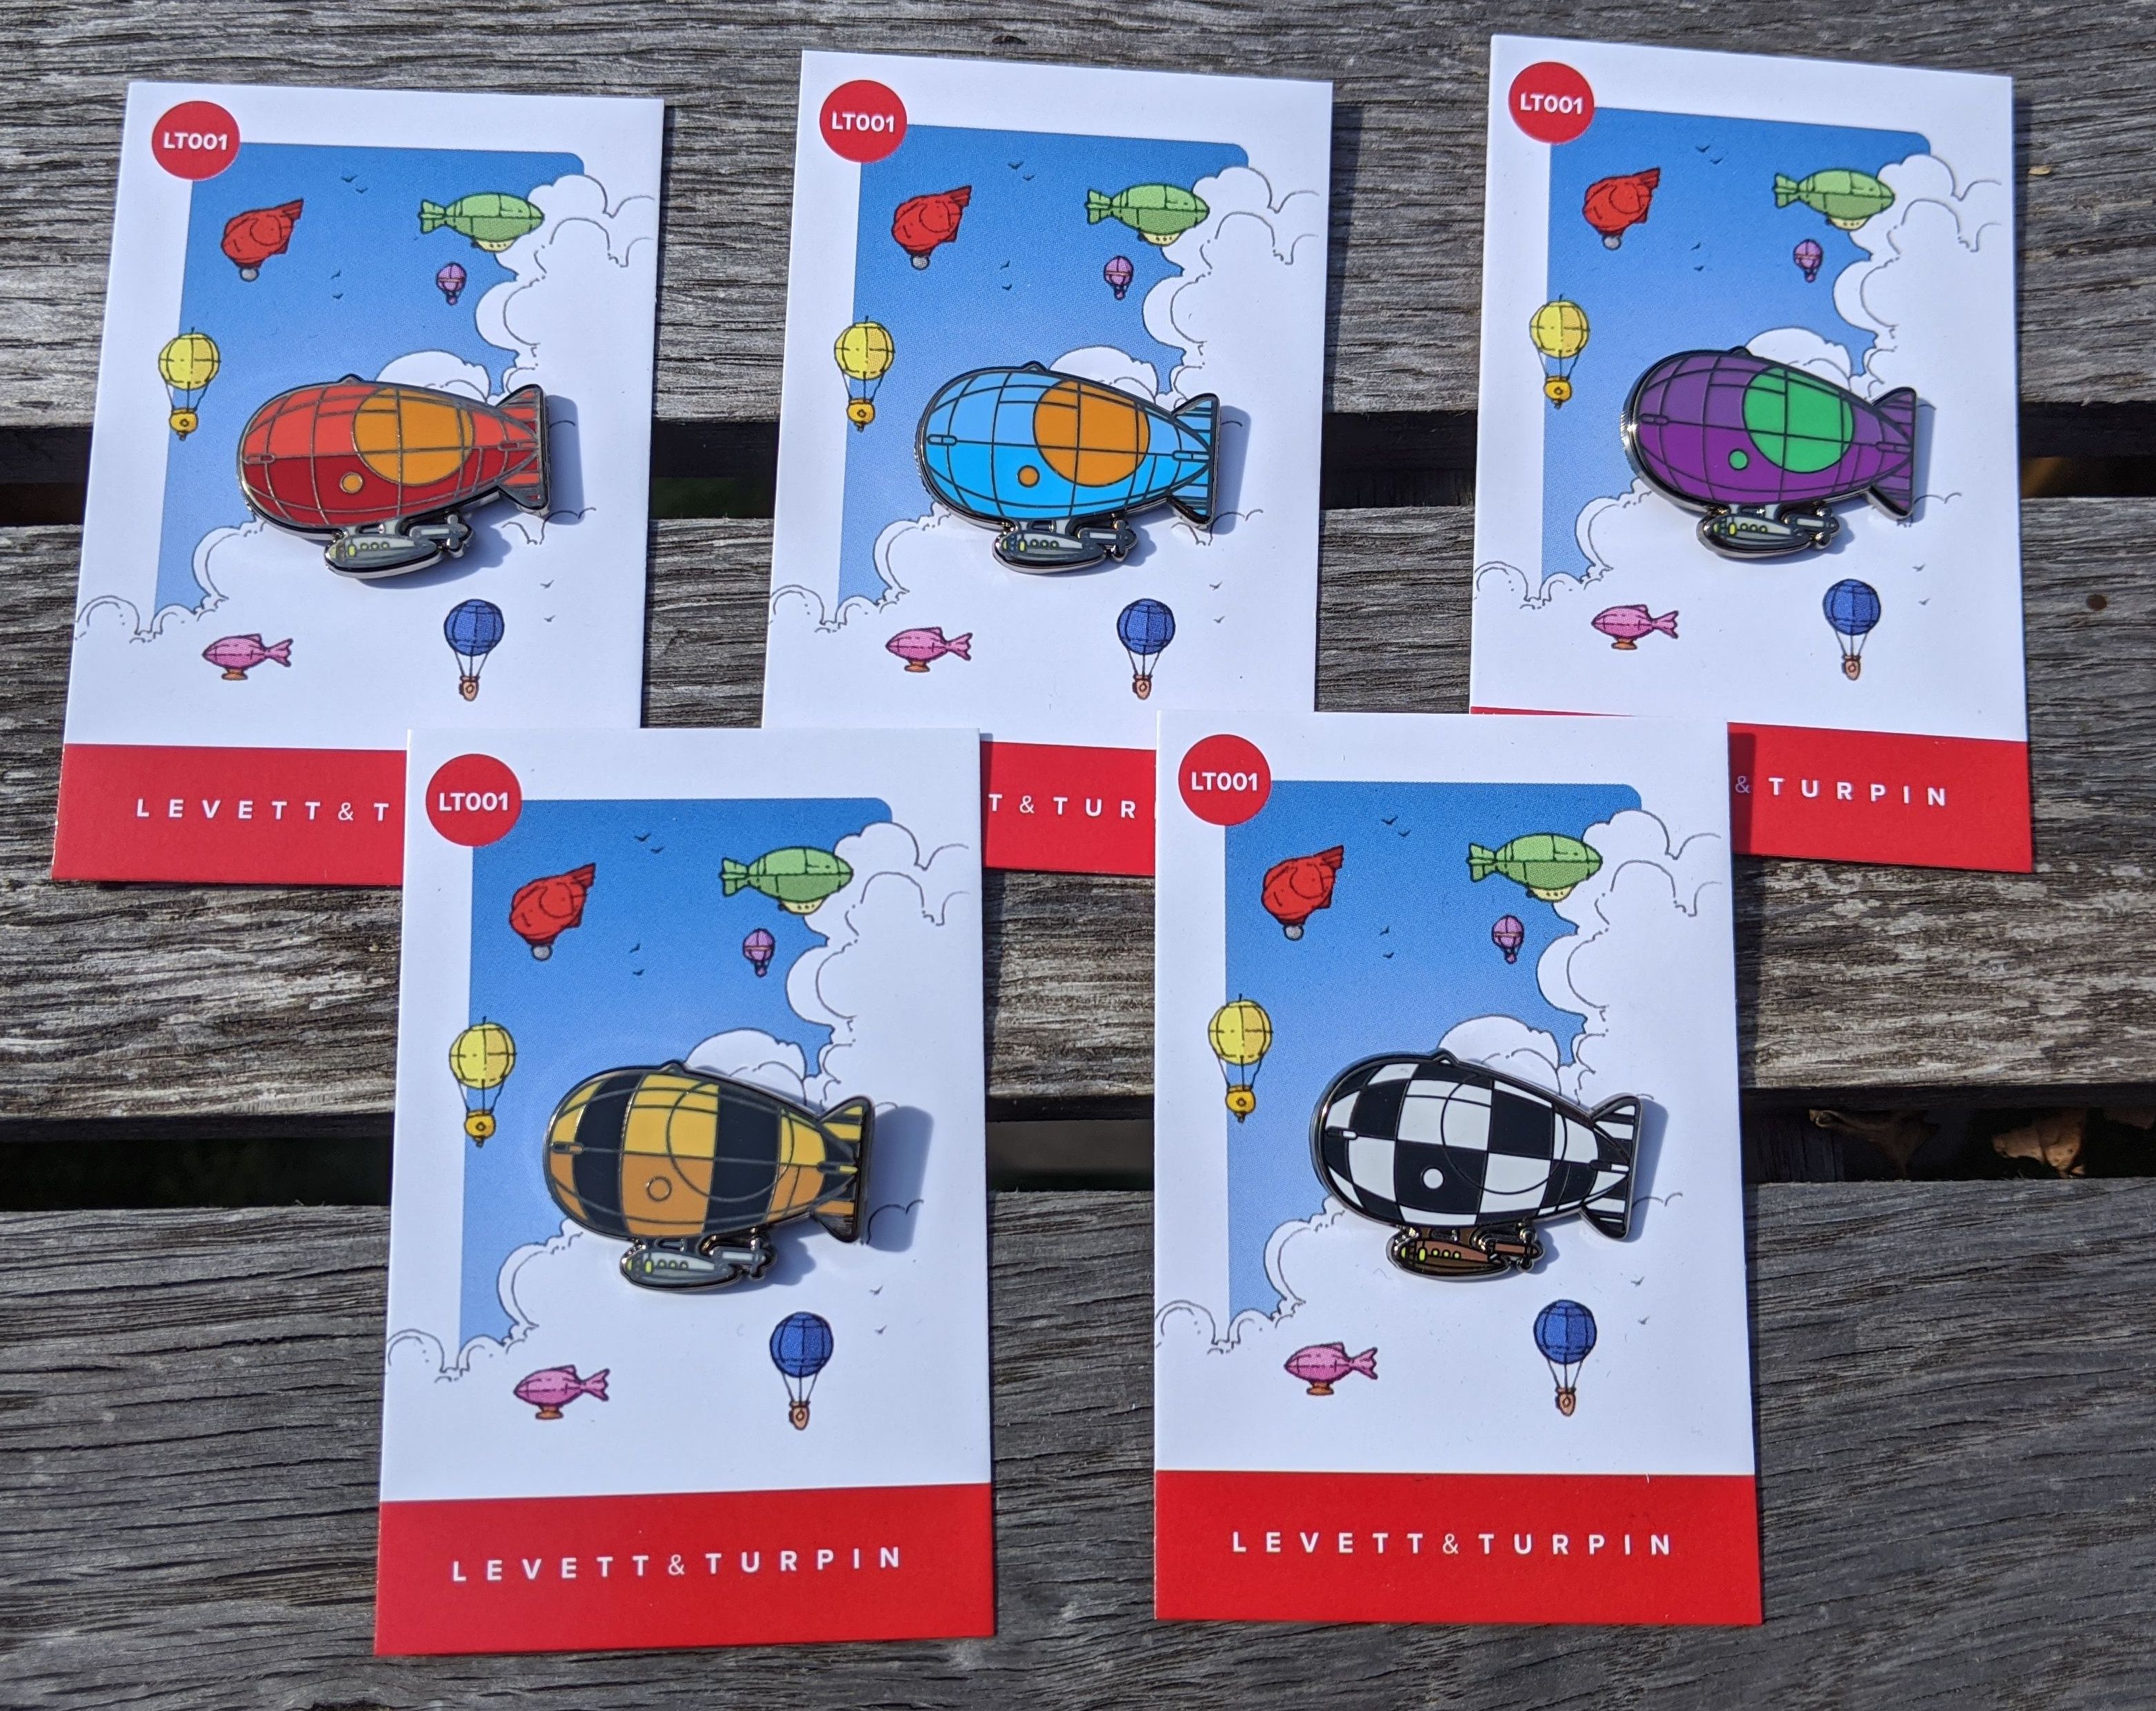
Pins on high-quality Turpin-designed cards.
My previous backing cards were, er, extremely low-budget, but for this one I had a proper graphic designer working with me. I used printed.com for the designs Rob produced, and it all ended up looking absolutely lovely. However! Adding a large number of pins to their cards was quite fiddly and time consuming. It was much more difficult, too, with the design #2 with its two pins, which had to be quite carefully aligned.
I’ve always been a bit prejudiced against the newer rubber pinbacks and preferred the butterfly style clutches, but I’m going to be honest, taking several hundred of those off pins, putting those pins through backing cards and then jamming them back on again was an absolute flipping nightmare and nearly had my fingertips bleeding at the end.
So next time I will: Get rubber clutches and look into labour-saving devices like this interesting backing card press someone recommended. Factor in a bit more time for packaging.
Lesson 10: Postage and Labels
I use the Royal Mail Click & Drop service to print my postage labels. It’s not that difficult to upload the bulk addresses Kickstarter extrudes into a format which the site can and print labels in bulk. I paid myself for tracking on large orders but charged for cheap, untracked International Standard postage which kept costs down for my buyers. I haven’t had to deal yet with any pins going missing (and may need to update this lesson as and when I do.)
Customs labels, Robespierre, and desperately needed tea.
The labels are produced as PDF files; label printers are a bit outside my budget at the mo but I bought cheap sticker paper which would run through my home printer and printed them 4 to a page (regretfully I had to use Acrobat to print rather than my much-preferred SumatraPDF). These were then cut up with a £7 paper guillotine. I did the same thing for the CN22 customs labels.
Also, I used the label cutoffs to make FROG TAPE.
Easily the most fiddly and annoying part of this whole business was… peeling the labels off the backing paper. Seriously, it was a nightmare!
So next time I will: Grow out my thumbnails. And if I’m trying to make a business of this long term, look into getting a label printer – but for now printing and guillotining label paper is working just fine.
Before launching, I’d done some prep work drafting update posts and working up timescales, budgets and plans, but I hadn’t actually got every single post 100% ready by the time I pushed the button. A lot more could have been effectively prepared before starting, especially graphics, but I was in a hurry to start and made things up a bit as I went along. My original plan had been to do polls on second designs and extra colourways after the kickstarter finished, which I quickly realised was ridiculous as extra colourways were going to be the main draw for anyone buying more than one airship. The kickstarter immediately smashing all early goals meant I needed lots of extra colourways pronto and didn’t feel ready. The rush also meant I had to bother Rob for artwork at quite short notice (or cook up my own in Paint with very limited graphic design skills).
I’m working with a highly skilled professional illustrator! There’s no need for things to look this amateurish!
So next time I will: plan a schedule of posts, polls &c out carefully in advance, and make sure all necessary graphics and such are ready for all of them before I pull the trigger. Especially because…
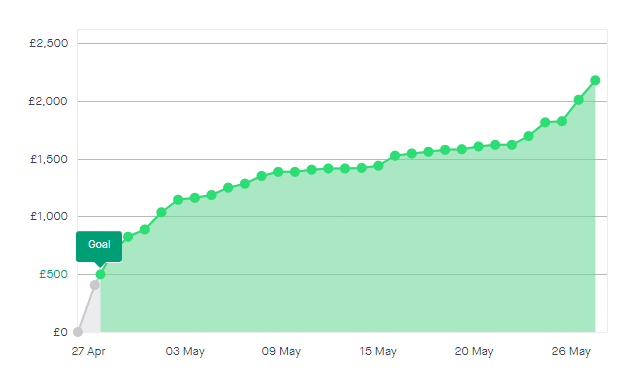
Lesson 2: Money comes in much faster at the beginning and the end.
NYOOooooOooooOMMM
I’d seen this before on other kickstarters so it didn’t come completely by surprise, but the “first week/last hour” thing is very real. I was mainly overwhelmed because the kickstarter did much better than I was expecting in the first week – not a bad problem to have! It then went pretty flat for the middle of the month. There was a genuine uncertainty a couple of days before finish about whether we’d reach the final stretch goal, but in the end it was smashed by nearly £200.
So next time I will: Do basically the same, but focus my publicity to push things at the very beginning and end, and consider this when planning stretch goals.
Lesson 3: Everybody Loves Democracy
The different designs proposed, and……how popular they ended up being.
There were LOADS of potential colourways for the airship (with my manufacturers, adding extra colours requires a minimum order but doesn’t add cost) which I had to narrow down so as not to get Silly. Running Doodle polls was a really easy way of doing this, and also a sort of free form of market research – the orange and blue combinations (which I don’t personally much like and wouldn’t have made on my own) proved extremely popular, so they ended up getting made.
Knowing the rough proportions of interest in each pin also meant I could prepare my order to my manufacturer before sending out the post-kickstarter survey to backers, saving everyone a week.
So next time I will: Do basically the same thing (if offering varieties of a design – if I know exactly what I want to produce running polls is a lot of time and effort.)
Lesson 4: Stretch Goals
Stretch goal #1 at £600, which was reached basically instantly.
The kickstarter broadly went quite well, but the initial few stretch goals were so close on the heels of the first deadline and so close to each other I was announcing them all being smashed almost immediately, making them meaningless. (They weren’t particularly ambitious or expensive goals to fulfil, but still.) I had to improvise a bunch – I was only originally planning on doing four or five colourways total rather than the nine I ended up with. The later ones were decently spaced out, but I think Design #2 was also reached too early as the minimum manufacturing cost wiped out any potential profit from the first £1500.
So next time I will: Spread out stretch goals further, bearing in mind lesson 2, and look at them with an eye for the budget. Stretch goals relate quite closely to…
Lesson 5: Budgeting and Profit
I’ve seen people recommend running pin kickstarters on the above “third” basis (ie 1/3 for minimum manufacturing costs to meet pledge, 1/3 for overheads – shipping and kickstarter fees – and 1/3 for profit/margin of error). The overheads and minimum worked out roughly right. However, unlike most pin kickstarters I was also paying Rob fees, and really should have put the initial target up to reflect that – the budget was initially very tight. I ended up making no profit at all off the KS because I put all the profits into further pin manufacture to sell in the long run, but that was a deliberate choice rather than being forced on me – if I’d just made enough to cover orders there would have been a moderate profit, though less than 1/3.
So next time I will: Ensure goals which front-load profit a bit more and factor in in artist costs from the very beginning. As well as changing the goals, this could have been affected by better handling the…
Lesson 6: Pricing and Tiers
I wanted the pin to be cheap for backers, but given the budget I think I went too far and underpriced it for what it ended up being (particularly as it ended up costing a bit more to manufacture than expected). This wasn’t helped by a slightly silly pricing structure I came up with, where it was functionally £5 per pin at all tiers unless you bought one for £6 or early bird three for £14. Early bird tiers could have been distinguished a bit more – and I’ve seen postcards and stickers as nice extras which would be worth doing in future. The “airship+frog” tier sold out extremely quickly, to my surprise – having the option to buy another design is something that I’ll definitely bear in mind in future.
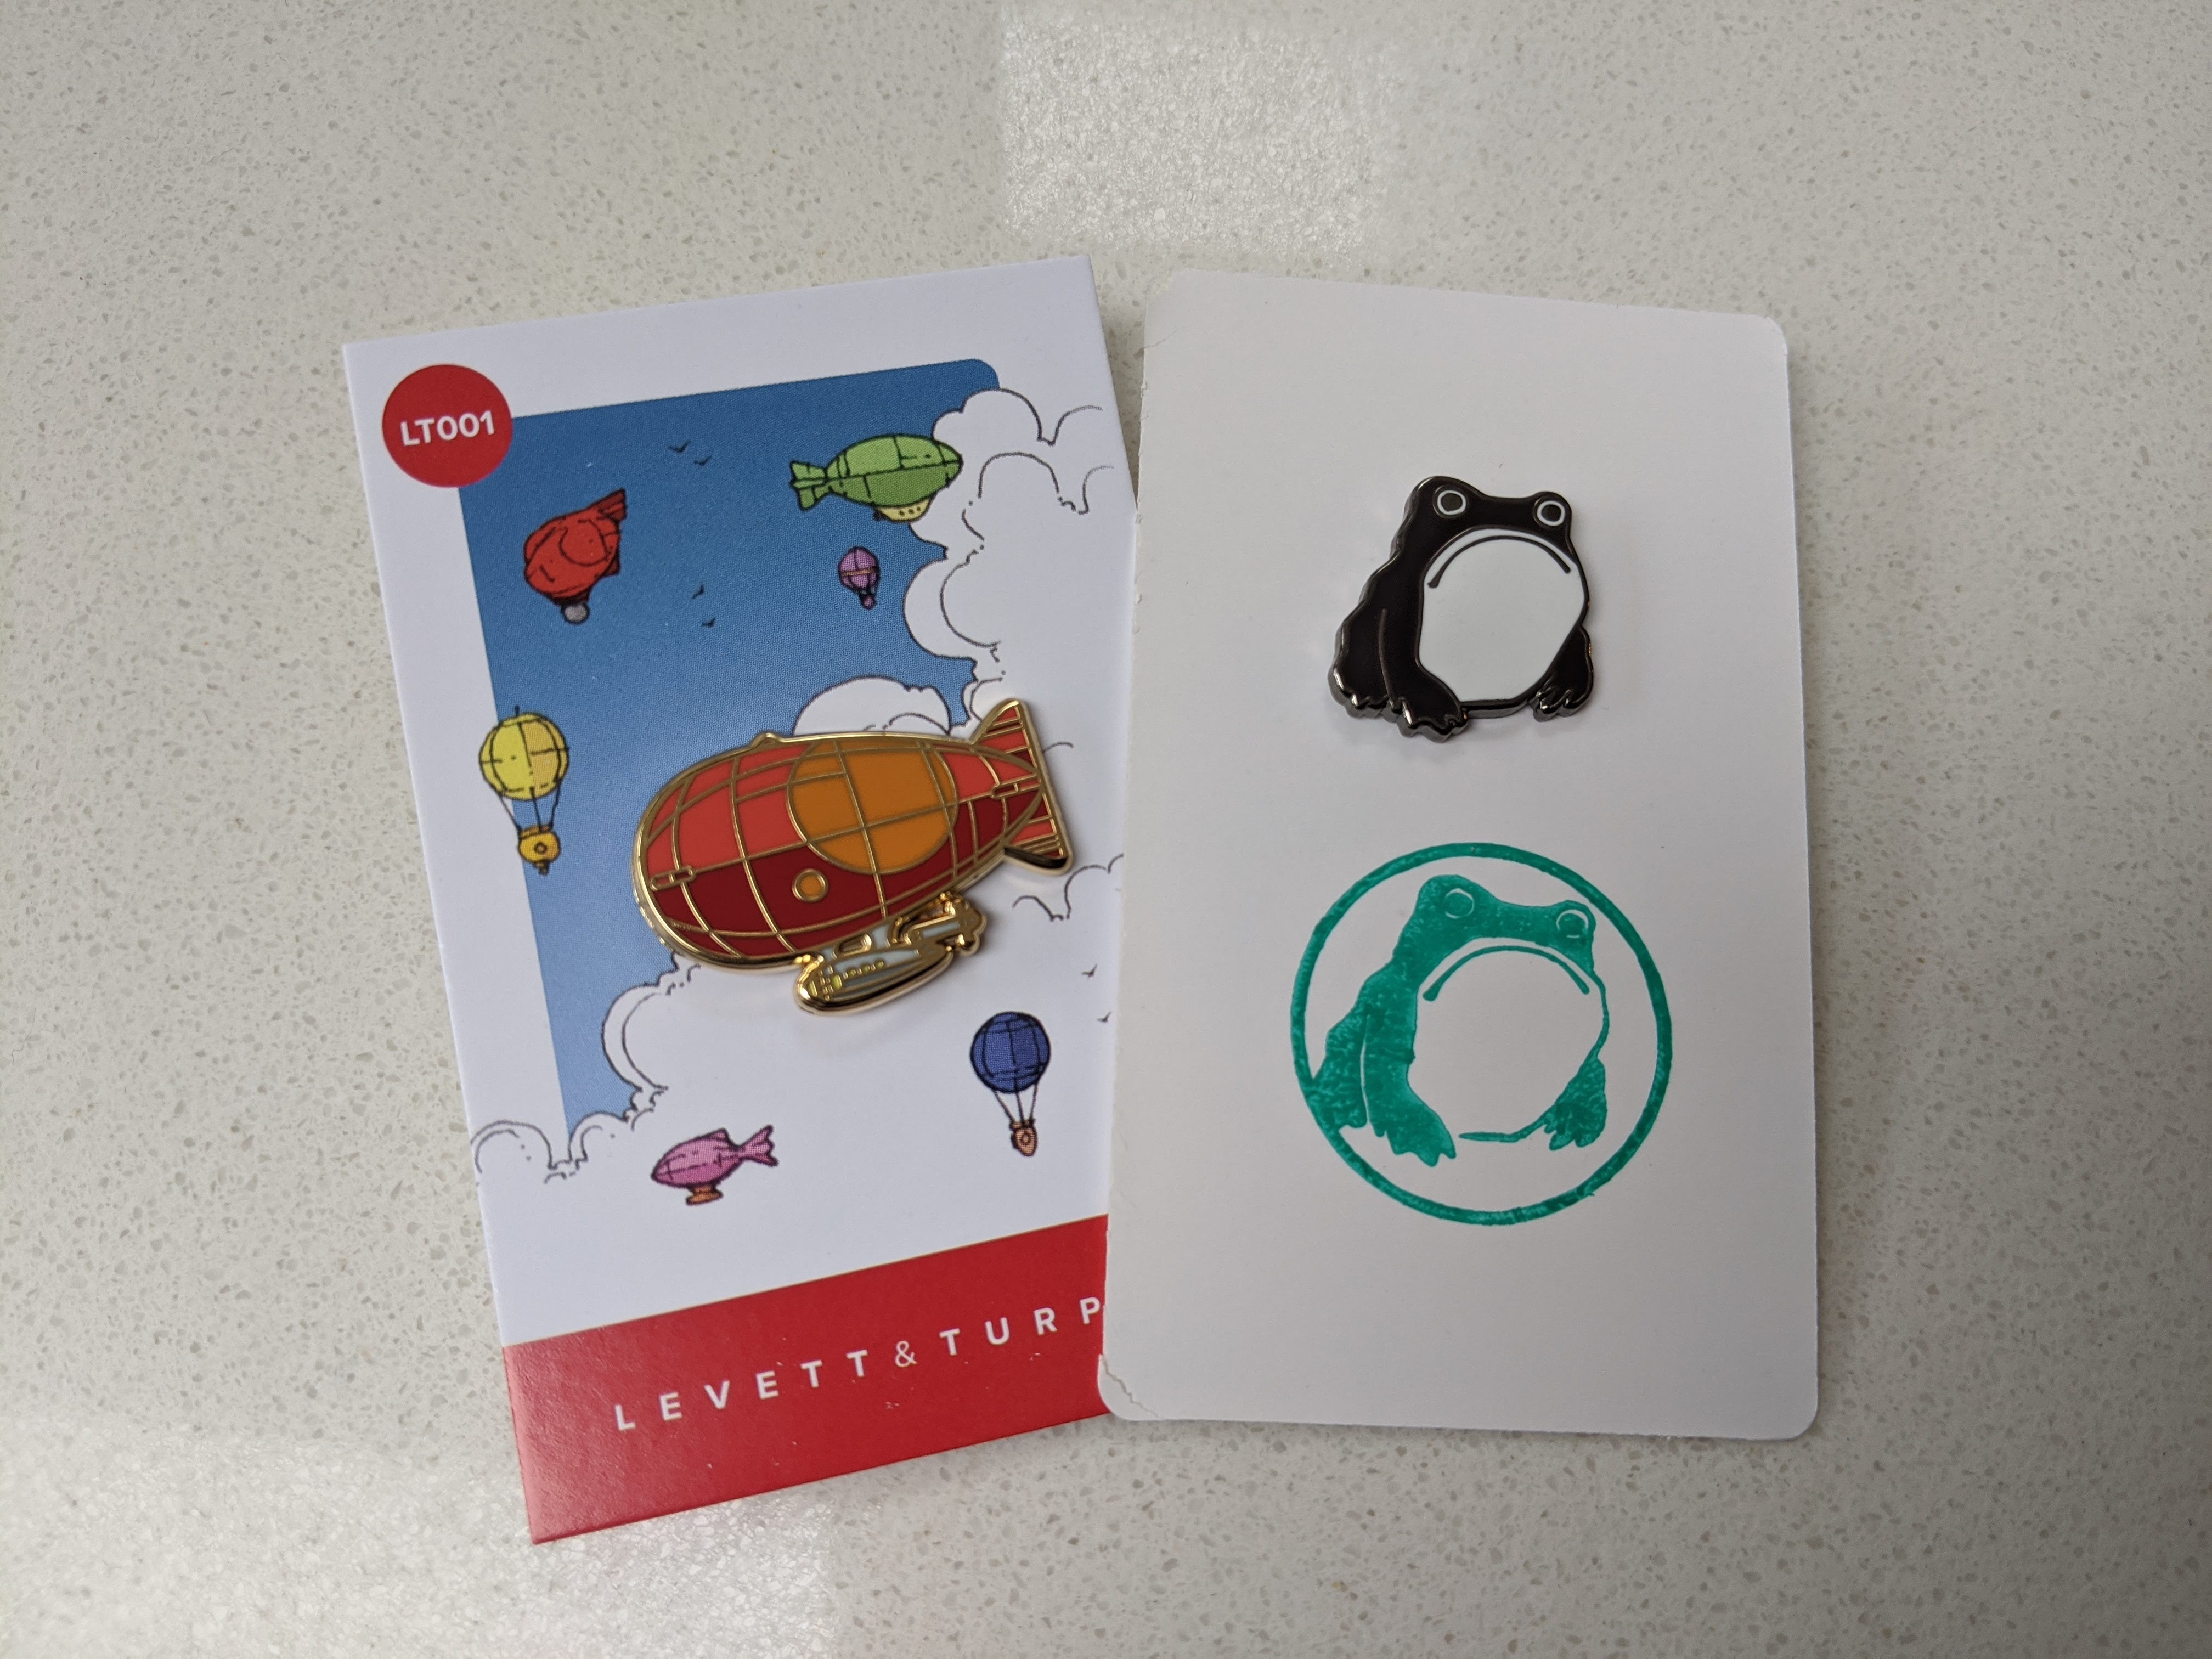
An unexpectedly popular match – my second and first commercial pin designs. Note the, er, significant difference in quality of backing card.
So next time I will: Either improve or do away with the idea of an early bird tier; have a slightly more profitable starting price and standardise it at all tiers except for quite large orders. (There are other good reasons for this – which I’ll discuss in the next post, about FULFILLING ORDERS.)
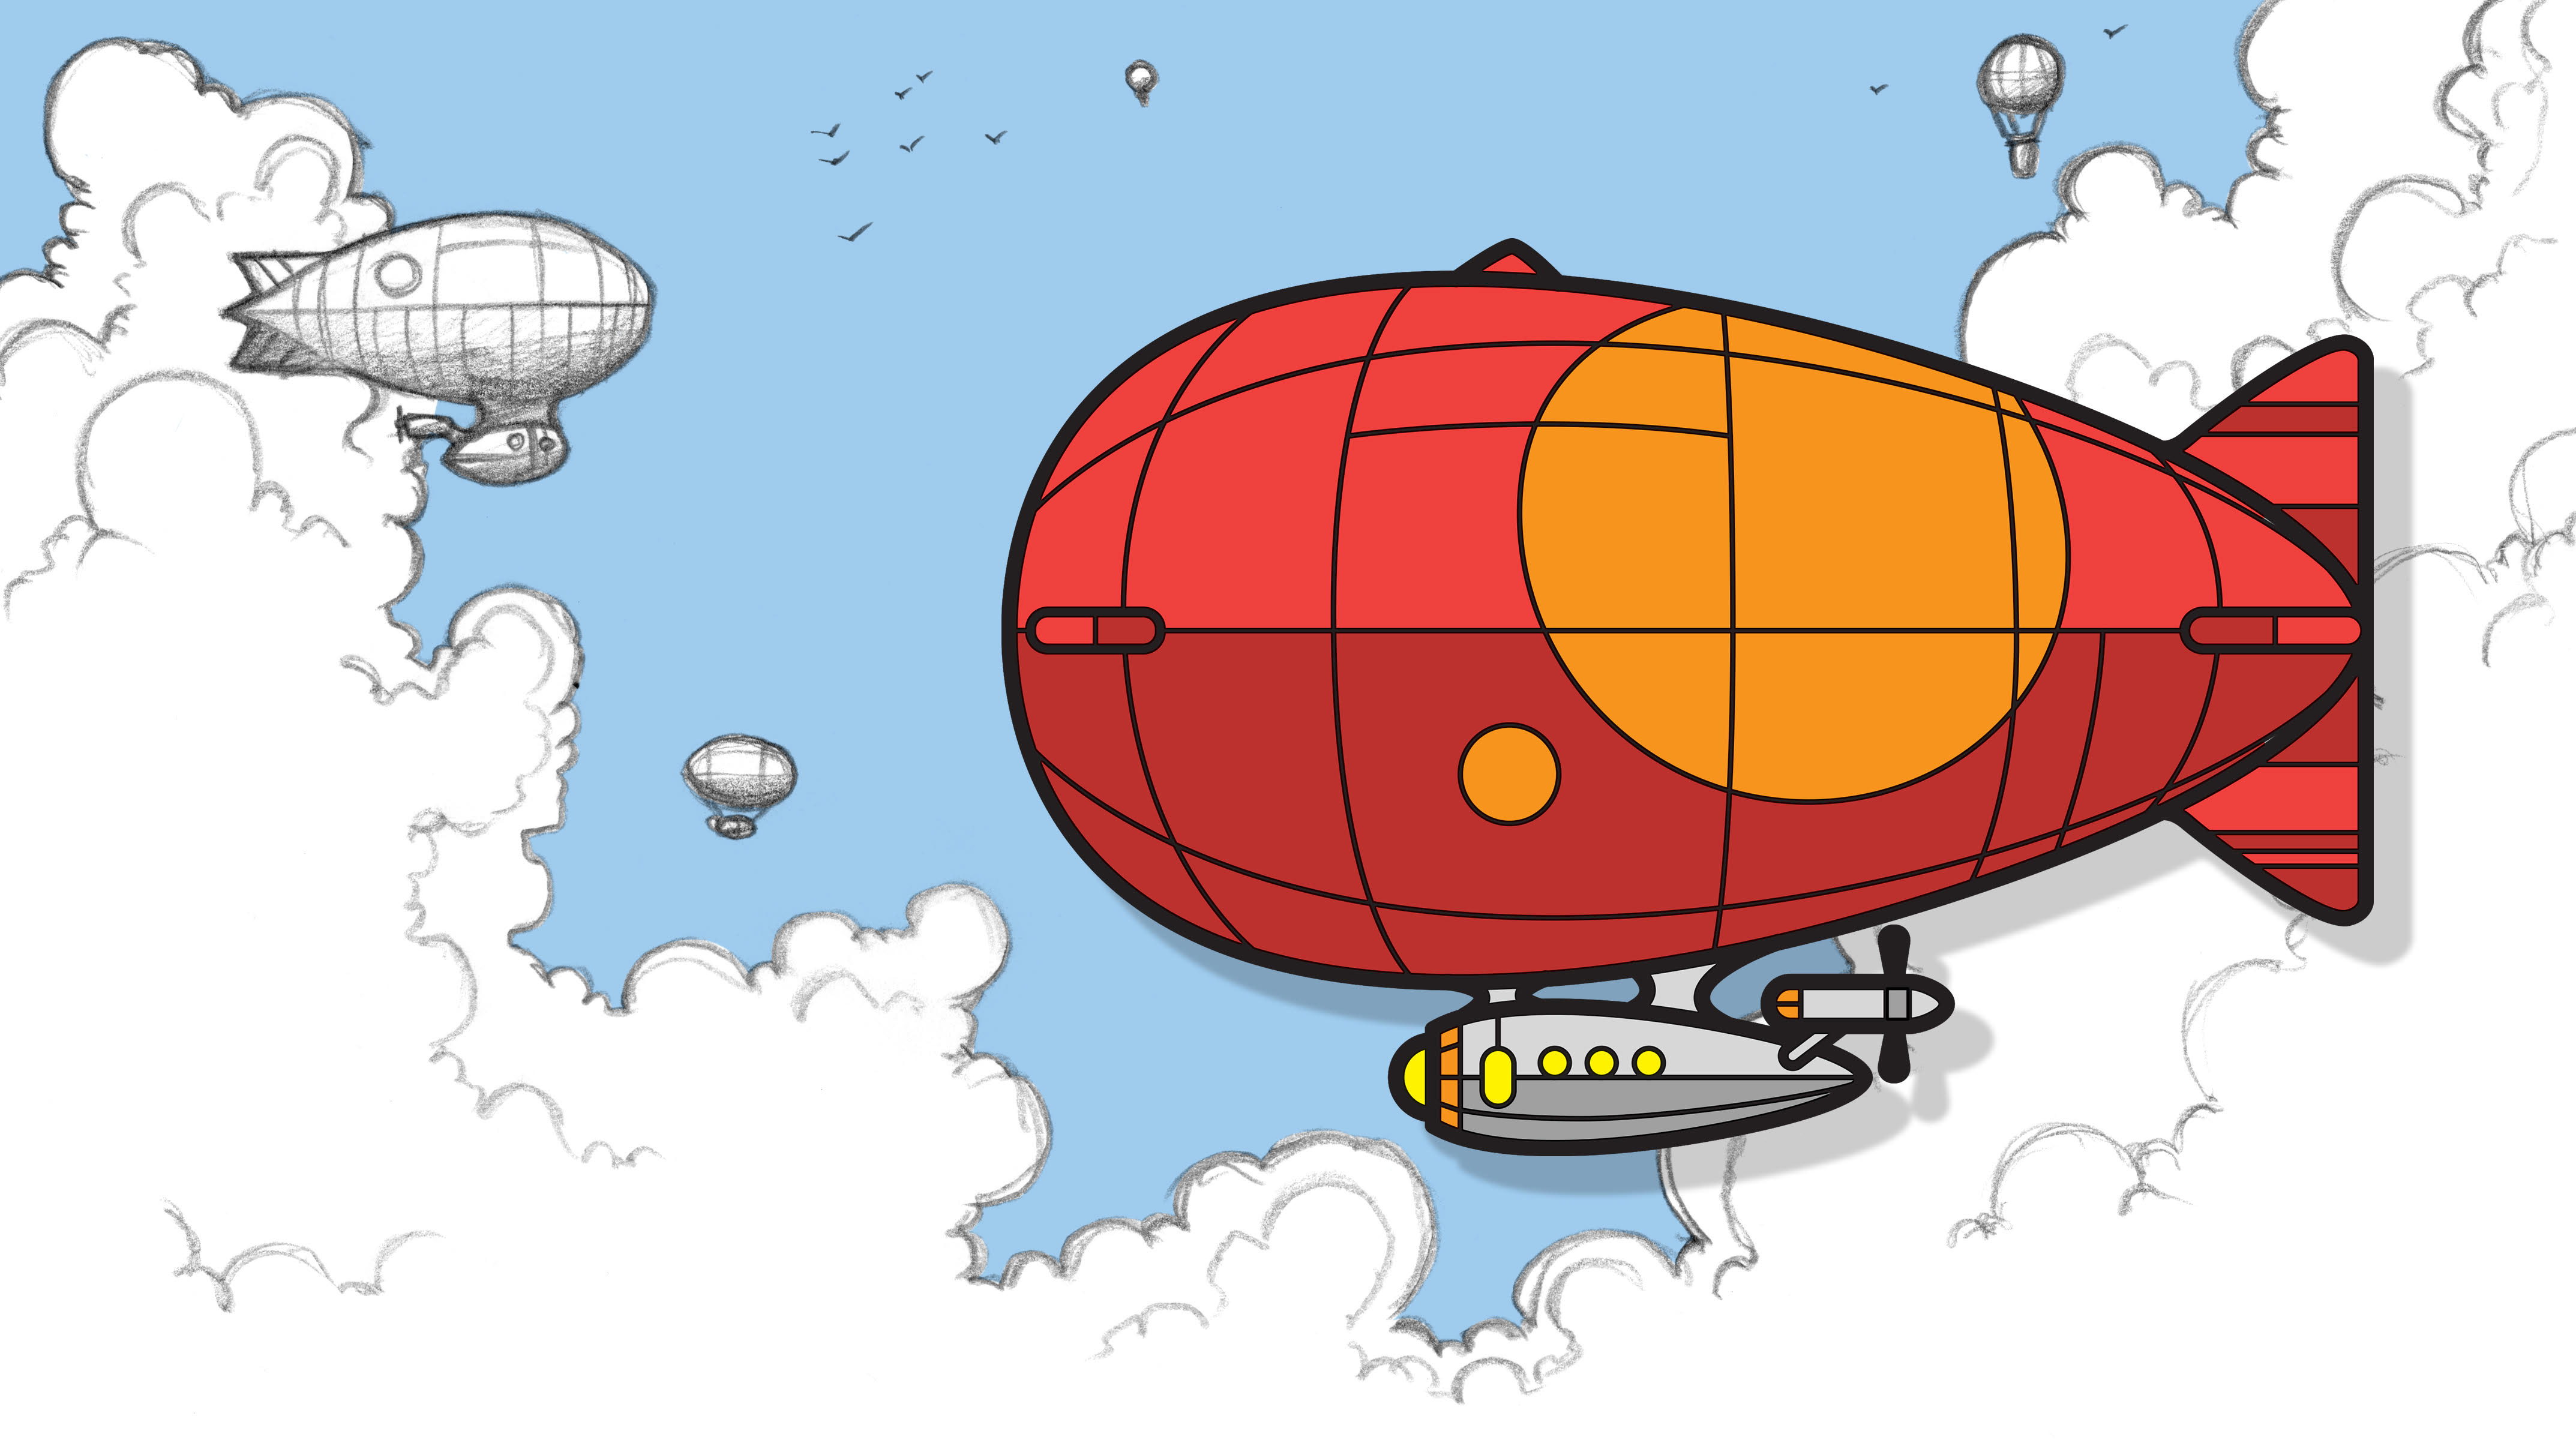
Would you like to own a lovely little red airship enamel pin badge? I know I would, that’s why I’m running this…
Rob Turpin and I met working together on The Illustrated World of Mortal Engines and I’ve loved his art from first sight. The design we’re manufacturing is original art commissioned specifically for this pin, of a little red airship. This will be the fourth pin design I’ve had manufactured, the second I’m producing commercially, and the first I’ve Kickstarted.
The Design
The design I’d like to make will be 25mm hard enamel with black nickel backing. Hard enamel means that it’ll have a smooth, flat finish (as opposed to soft enamel – there’s a good explanation here), which costs more to make but gives a lovely high quality feel. Black nickel means that the metal of the underlying pin will be a glossy black (rather than the more common gold or silver) which I think really suits Rob’s clear, detailed linework.
The final pin will look much like the one in the header image. Here’s a sketch from development.
Timelines
May 2020: Kickstarter will run, and hopefully reach its target.
June 2020– Design and Ordering: I expect the process of finalising and ordering the design(s) will only take a week or so but am allowing a month. If I reach the higher stretch goals I’ll also use June to poll backers about what colour/designs they’d like.
July-August2020 – Manufacture: Based on previous experience, it takes 4-6 weeks for the pins to be manufactured and to get to me. I’m allowing two months to be generous – I suspect nobody will mind if their pins come earlier. You can read more about the precise manufacturing timescales here.
September2020 – Shipping: The pins come to me, and I post the pins to you. I use Royal Mail first class delivery in the UK and International Standard for the rest of the world, which rarely takes more than a week to get anywhere.
October2020: Hopefully, everyone will have their pins by then!
Relevantexperience
This will be the fourth design I’ve manufactured and the second I’ve shipped commercially after one I sell on Etsy (you can read my reviews there!). The latter took quite a while to get around to making a profit, and I’ve commissioned the art professionally, so I’ve decided to run a Kickstarter so as not to end up out of pocket.
My previous pin designs. The one on the right is for sale.
I’ve had all my previous designs produced by The Enamel Pin Factory, and they’ve been very good at communicating promptly and producing high-quality products with no quality issues or “seconds.”
Budget and Postage
My initial goal is £500 which will support a minimum run of a hundred pins. Around half the goal money will go to manufacturing the pin and the rest towards paying the remainder of Rob’s artist fees. Pins are quite cheap to ship, but the price varies for me based on where you are in the world.I use Royal Mail first class delivery in the UK and International Standard for the rest of the world for orders of up to ten pins, and Royal Mail Tracked for larger orders. I’ll ship all pins in small recyclable jiffy-bags.
Stretch Goals
The initial goal is just to produce the pin itself, but I’ve had some ideas for what happens if I hit higher goal targets…
£600 – Stamped Backing Cards. I’ll get a custom rubber stamp made of the airship design, and put the pins into hand-stamped cards, as a slightly labour-intensive but cost-effective form of backing card. (I already do this with my Gloomy Frog pin.)
£700 – Printed Backing Cards. At this point I’ll be able to afford to have proper backing cards made up by the manufacturer. Rob is happy to produce art for this – I’ll post concepts as and when it looks like we’re getting to the target.
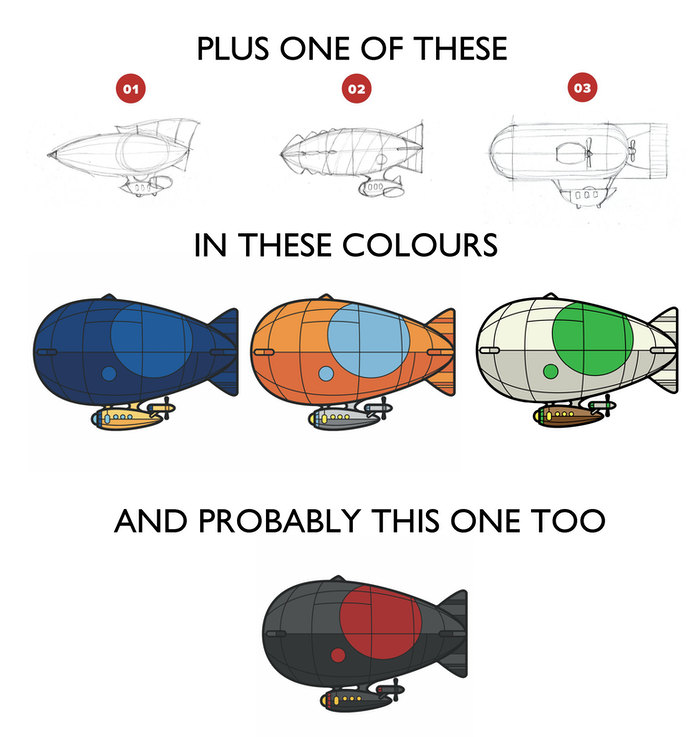
£800 – New Colour. Is red not your favourite colour? At this point I’ll be able to do a palette swap for the same design – I will poll to see what the most popular colour is, and backers will get a choice of the colour they want.
£1000 – New Design. Rob produced any number of lovely designs, some of which are below. At this point, I’ll look into commissioning him to finalising another. Again, backers will be able to vote for the design they like best.
Some of the many potential forms and shapes of airship.
Design
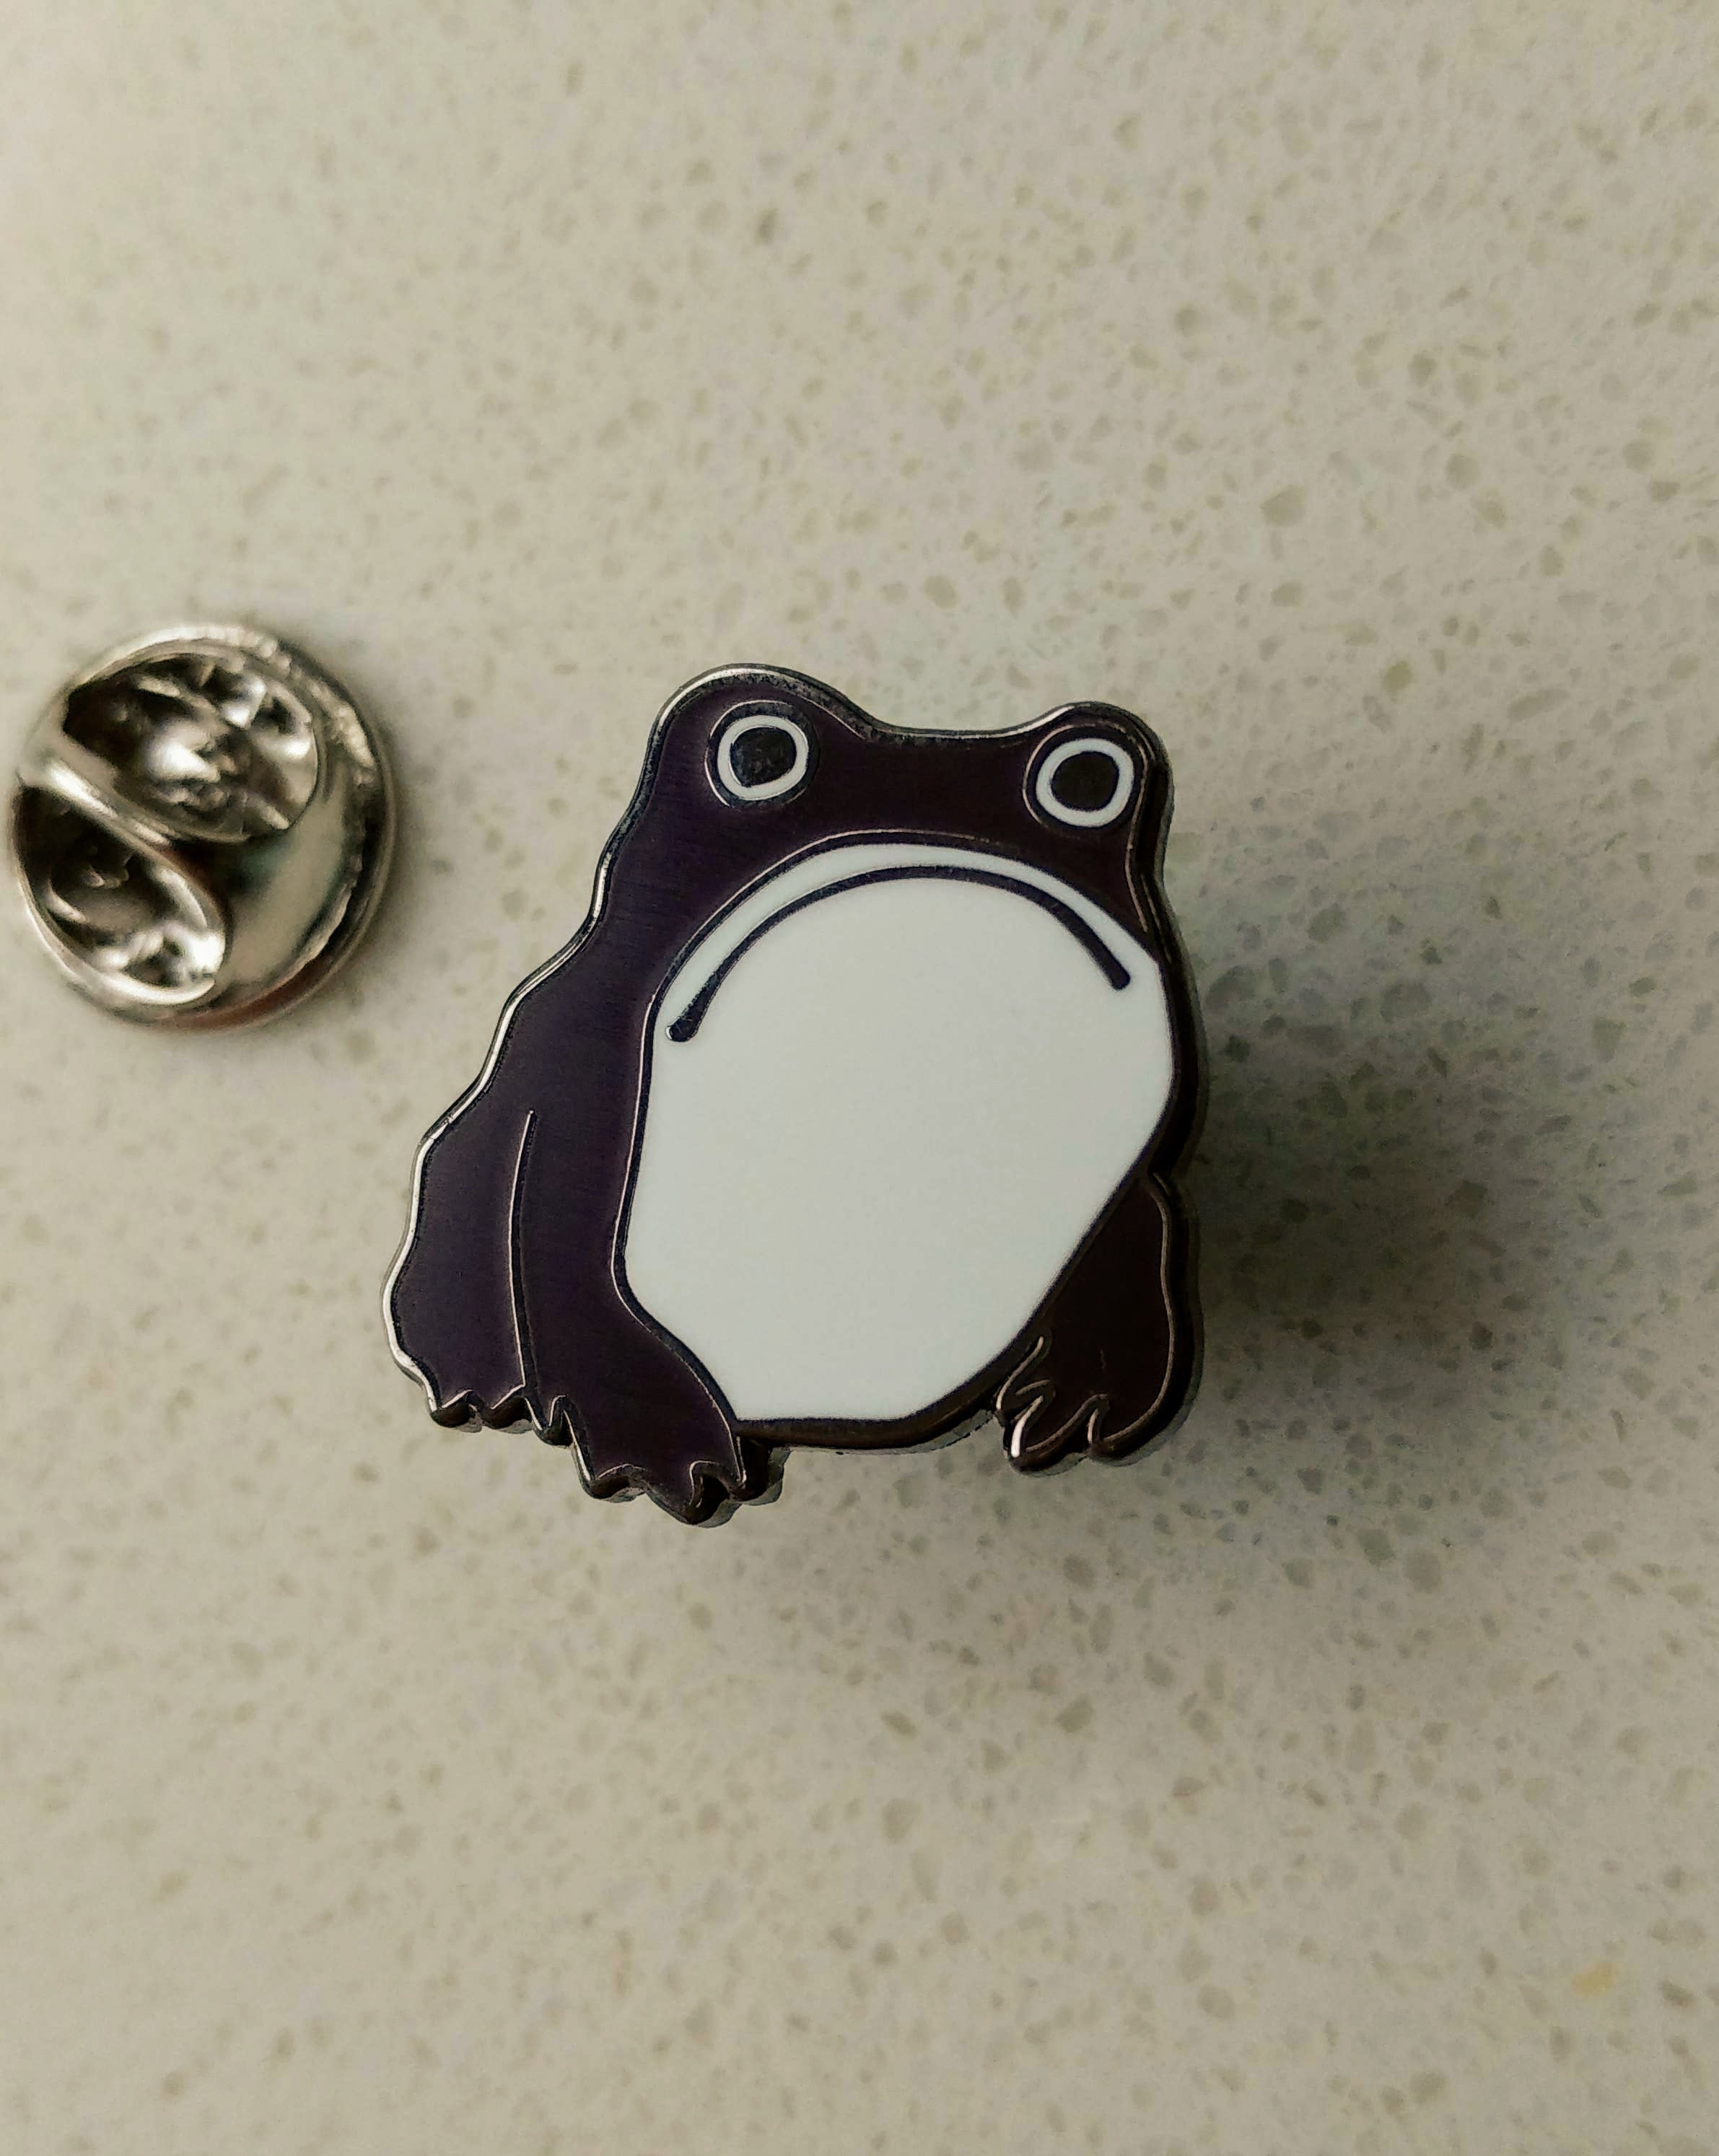
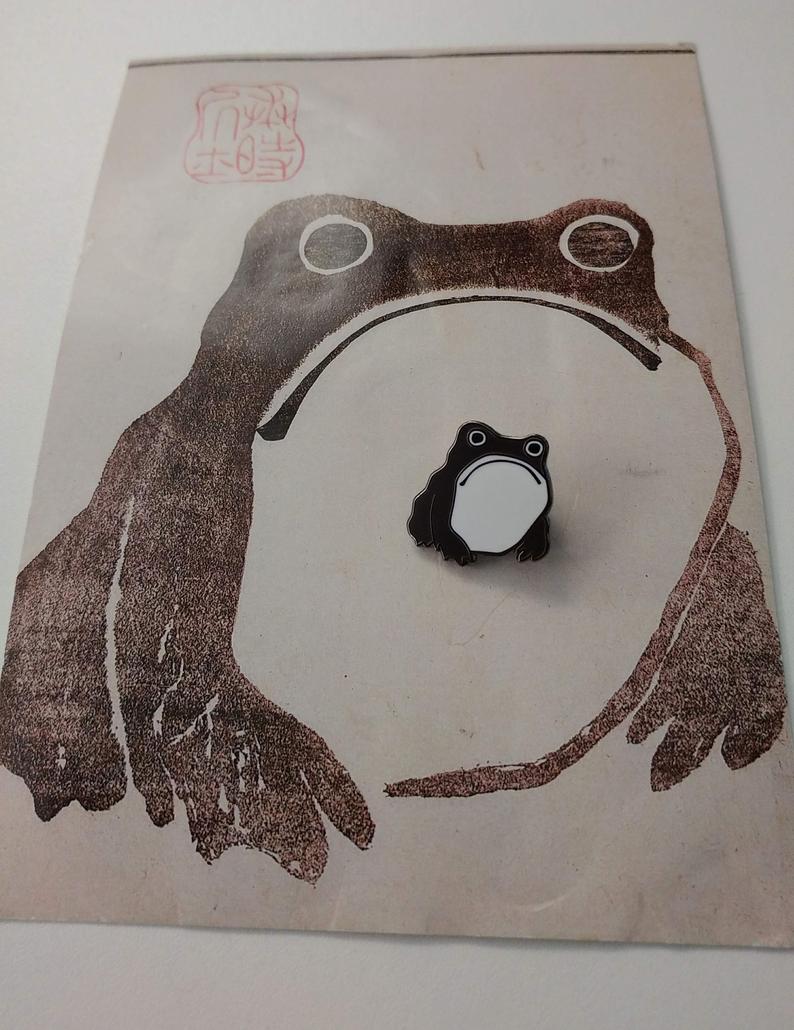
This is an enamel pin based on a lovely woodblock frog print by Japanese artist Matsumoto Hoji, from the 1814 book 名家画譜 “(Meika gafu”, an anthology of pictures by celebrated artists of the Edo period). I made a couple of very minor changes to the design in order to make him work as a pin, but believe I have preserved his glum, grumpy character. You can see the art which inspired this badge at the British Museum in London, or find more details of it here: https://www.bmimages.com/preview.asp?image=00286082001
Material
20mm hard enamel, black nickel, single pin fixing, butterfly clutch.
His tummy is white but the rest of him is a very dark brown – it’s quite visually distinct from the black nickel in natural light.